Category: Healthy Eating

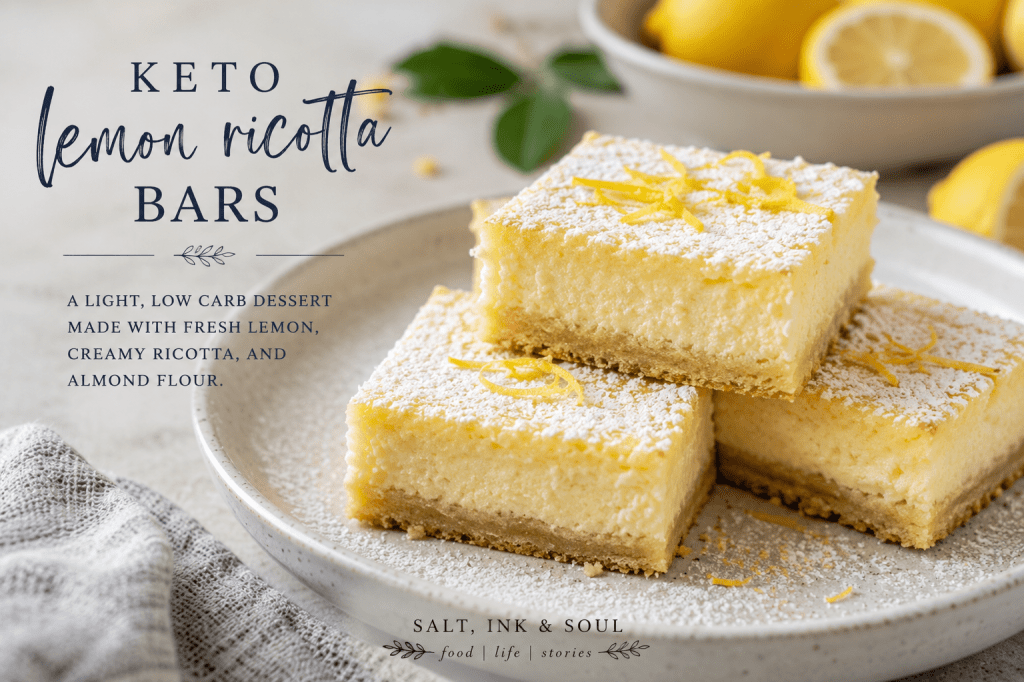
  • Keto Lemon Ricotta Bars: Sweetness After the Meal

    Keto Lemon Ricotta Bars: Sweetness After the Meal

    After a meal like spaghetti, something rich, red, and familiar, I don’t always want a heavy dessert.

    I want something small.

    Something bright.

    Something that does not feel like I have abandoned the care I was trying to practice.

    That is the strange balance of trying to eat better. You still want pleasure. You still want comfort. You still want the little ceremony of something sweet after dinner. But you also want to wake up the next morning without feeling like one craving turned into a whole surrender.

    So this dessert is meant to live in that space.

    Keto lemon ricotta bars.

    Soft, lightly sweet, touched with lemon, and held together by the quiet richness of ricotta.

    They are not as sharp as traditional lemon bars. Not as heavy as cheesecake. They sit somewhere in between. Gentle. Bright. Creamy. The kind of dessert that does not need to be large to feel satisfying.

    And maybe that is the lesson.

    Sometimes enough does not have to be much.

    Sometimes enough is one small square, cold from the refrigerator, eaten slowly after a meal you planned instead of a meal you fell into.

    This is not about pretending dessert does not matter.

    It does.

    It matters because food is not only fuel. It is comfort. Memory. Reward. Routine. A small kindness at the end of the day.

    The work is learning how to make room for that kindness without letting it take the whole house.

    Keto Lemon Ricotta Bars

    Ingredients

    For the Crust

    • 1 1/2 cups almond flour
    • 1/4 cup powdered keto sweetener
    • 1/4 teaspoon salt
    • 6 tablespoons unsalted butter, melted
    • 1 teaspoon vanilla extract

    For the Lemon Ricotta Filling

    • 1 cup whole milk ricotta cheese
    • 3 large eggs
    • 1/2 cup powdered keto sweetener
    • 1/3 cup fresh lemon juice
    • 1 tablespoon lemon zest
    • 1 teaspoon vanilla extract
    • 2 tablespoons almond flour
    • 2 tablespoons heavy cream
    • 1/4 teaspoon salt

    Optional Topping

    • Powdered keto sweetener, for dusting
    • Extra lemon zest

    Instructions

    1. Prepare the Pan

    Preheat the oven to 350°F.

    Line an 8×8 baking pan with parchment paper, leaving some overhang on the sides.

    That small piece of paper hanging over the edge may not look important now.

    Later, it becomes the thing that helps you lift everything out cleanly.

    Some things are like that.

    Quietly useful.

    2. Make the Crust

    In a mixing bowl, combine the almond flour, powdered keto sweetener, and salt.

    Add the melted butter and vanilla extract.

    Stir until the mixture comes together and looks like soft crumbs.

    Press the crust firmly into the bottom of the prepared pan.

    Take your time here. A crust needs pressure. It needs to be shaped. It needs a foundation before anything sweet can be poured over it.

    Bake for 10 to 12 minutes, until the edges are lightly golden.

    Remove from the oven and let it cool slightly while you make the filling.

    3. Make the Lemon Ricotta Filling

    In a bowl, whisk together the ricotta cheese, eggs, powdered keto sweetener, lemon juice, lemon zest, vanilla extract, almond flour, heavy cream, and salt.

    Whisk until the filling is smooth.

    If your ricotta is a little grainy, you can blend the filling in a food processor or blender for a silkier texture.

    The lemon should come through clearly, but not loudly.

    The ricotta should soften it.

    That is what ricotta does here. It takes the sharpness and gives it somewhere to rest.

    4. Bake the Bars

    Pour the lemon ricotta filling over the warm crust.

    Smooth the top gently with a spatula.

    Bake for 25 to 30 minutes, or until the center is set but still slightly soft.

    Do not overbake.

    These bars should feel tender, not dry.

    They will continue to firm up as they cool.

    5. Cool and Chill

    Let the pan cool at room temperature for about 30 minutes.

    Then place it in the refrigerator for at least 3 hours.

    Overnight is even better.

    Some desserts need time. Not because they are difficult, but because they become better when left alone.

    There is a lesson in that too.

    6. Slice and Serve

    Once chilled, lift the bars from the pan using the parchment paper.

    Slice into 12 squares.

    Dust lightly with powdered keto sweetener if desired.

    Add a little extra lemon zest on top for more brightness.

    Serve cold.

    That is when they are best.

    Soft.

    Creamy.

    Bright at the edges.

    Storage

    Store the bars in an airtight container in the refrigerator for up to 5 days.

    They can also be frozen for up to 2 months.

    If freezing, place parchment paper between layers so the bars do not stick together.

    Thaw in the refrigerator before serving.

    Notes from the Kitchen

    Use fresh lemon juice if you can.

    Bottled lemon juice will work, but fresh lemon gives the bars their lift. Their clean edge.

    Whole milk ricotta gives the best texture. Part-skim ricotta can work, but the filling may be slightly less creamy.

    Powdered keto sweetener works better than granular sweetener because it keeps the filling smoother.

    Allulose will give a softer texture. Erythritol-based sweeteners may firm up more and can have a slight cooling effect.

    If you want these bars more like cheesecake, add 2 ounces of softened cream cheese to the filling.

    If you want them lighter, leave the recipe as written.

    Serving Size

    Cut into 12 squares.

    Depending on the exact sweetener and brands used, each bar is usually around 3 to 5 net carbs.

    Final Thought

    A dessert does not have to be reckless to be good.

    It doesn’t have to be large.

    It doesn’t have to be a return to old habits just because it is sweet.

    Sometimes dessert can be measured. Planned. Held in the hand without guilt.

    One small square after dinner.

    A little lemon.

    A little ricotta.

    A little reminder that discipline does not mean removing every pleasure from the table.

    Kyle J. Hayes

    kylehayesblog.com

    Please like, comment, and share

    Resources for Hard Times

    If you’re looking for practical help, food support, or community resources, you can visit the Salt, Ink & Soul Resources Page.
    👉 Resources for Hard Times

  • Salt, Ink & Soul Healthy Spaghetti

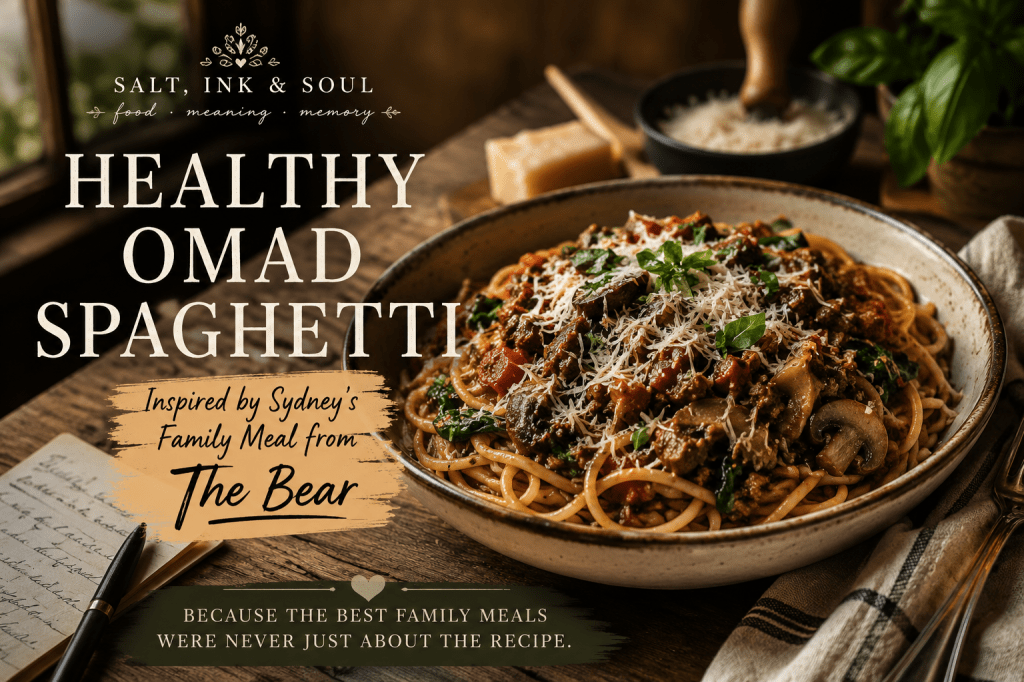
    Salt, Ink & Soul Healthy Spaghetti

    Inspired by Sydney’s Family Meal from “The Bear”

    I’ve been trying to watch as much of The Bear as I can. It’s not always easy. The show has a way of turning up the heat—not just in the kitchen, but in the people. There are moments when the intensity becomes a little too much for me, so I pause it, step away, and come back another day. But every time I do, I find myself thinking about the food. It isn’t just something to eat; it’s another way the characters care for one another, even when they don’t know how to say the words.

    One of my favorite parts of the show is the family meal. It reminded me that the meals we remember most are rarely about the recipe itself. Years later, we don’t always remember exactly what was seasoned with this or cooked for that long. We remember who was sitting around the table. The conversations that stretched a little longer than the meal. The laughter. The stories. The comfort of knowing that, for a little while, everyone belonged in the same place.

    That inspired me to try making some of the dishes from the show in my own kitchen. Not exact copies, and probably not all of them. Just the ones that feel within reach, with a few small changes to better fit the way I’m eating these days. My goal isn’t to recreate the restaurant. It’s to bring a little of that feeling home.

    So here’s my healthier take on Sydney’s family meal spaghetti—a version made for One Meal A Day (OMAD), with plenty of lean protein, vegetables, and just enough real pasta to remind me that eating well doesn’t have to mean giving up the foods that bring us comfort.

    Salt, Ink & Soul Healthy Spaghetti

    Servings

    4 meal-prep portions

    Ingredients

    Protein

    • 2 pounds (907 g) 93% lean ground beef
    • (Optional) Replace ½ pound with lean Italian turkey sausage for a little extra flavor.

    Pasta

    • 8 ounces (227 g) high-quality dried spaghetti
      • This works out to 2 ounces (56 g) dry pasta per serving.

    Sauce

    • 1 (24-ounce) jar no-sugar-added marinara sauce
    • 1 (15-ounce) can crushed tomatoes
    • 2 tablespoons tomato paste

    Vegetables

    • 8 ounces mushrooms, sliced
    • 1 medium onion, diced
    • 1 medium zucchini, diced small
    • 1 bell pepper, diced
    • 3 cups fresh spinach
    • 4 cloves garlic, minced

    Seasonings

    • 2 tablespoons olive oil
    • 2 teaspoons Italian seasoning
    • 1 teaspoon dried oregano
    • 1 teaspoon dried basil
    • 1 teaspoon garlic powder
    • 1 teaspoon onion powder
    • ½ teaspoon crushed red pepper flakes (optional)
    • 1 teaspoon kosher salt, or to taste
    • ½ teaspoon freshly ground black pepper

    To Finish

    • Fresh basil, chopped (optional)
    • Freshly grated Parmesan cheese

    Instructions

    1. Build the Flavor

    Heat the olive oil in a large Dutch oven or heavy-bottomed pot over medium-high heat.

    Add the onions and mushrooms and cook for 5–6 minutes until they begin to soften and develop color.

    Stir in the garlic and cook for another 30 seconds.

    Add the ground beef and cook until browned, breaking it into small pieces as it cooks. If necessary, drain any excess fat.

    2. Add the Vegetables

    Stir in the zucchini and bell pepper.

    Cook for about 5 minutes until they begin to soften.

    Fold in the spinach and cook just until wilted.

    3. Simmer the Sauce

    Add:

    • Marinara sauce
    • Crushed tomatoes
    • Tomato paste
    • Italian seasoning
    • Oregano
    • Basil
    • Garlic powder
    • Onion powder
    • Salt
    • Pepper
    • Red pepper flakes (if using)

    Stir well.

    Reduce the heat to low and let the sauce simmer for 30–40 minutes, stirring occasionally.

    The longer it simmers, the deeper and richer the flavors become.

    4. Cook the Pasta

    While the sauce simmers, cook the spaghetti according to the package directions until al dente.

    Before draining, reserve about ½ cup of the pasta water.

    If the sauce needs thinning, stir in a splash of the reserved pasta water.

    5. Assemble

    Place approximately 2 ounces (56 g dry, cooked) spaghetti into each bowl or meal-prep container.

    Top generously with the meat-and-vegetable sauce.

    Finish with freshly grated Parmesan and chopped basil.

    Garlic Green Beans

    Ingredients

    • 1 pound fresh green beans
    • 1 tablespoon olive oil
    • 2 cloves garlic, minced
    • Salt and pepper
    • Juice of ½ lemon

    Instructions

    Bring a pot of salted water to a boil.

    Cook the green beans for 4–5 minutes until tender-crisp.

    Drain well.

    Heat the olive oil in a skillet over medium heat.

    Add the garlic and cook for about 30 seconds until fragrant.

    Add the green beans and toss for 2–3 minutes.

    Season with salt, pepper, and a squeeze of fresh lemon juice.

    Meal Prep

    Divide everything into four containers:

    • 2 ounces dry (56 g) cooked spaghetti
    • Generous serving of meat and vegetable sauce
    • Garlic green beans

    Each meal is packed with lean protein, colorful vegetables, and just enough pasta to satisfy the craving without overwhelming the plate.

    Salt, Ink & Soul

    One thing I’ve learned is that eating healthier doesn’t have to mean giving up the meals you love. Sometimes it simply means making room for better ingredients, a little more balance, and a little more intention.

    Like the family meals that inspired this recipe, this isn’t about perfection.

    It’s about taking the time to feed yourself well.

    Because the people gathered around the table always mattered more than the recipe.

    Kyle J. Hayes

    kylehayesblog.com

    Please like, comment, and share

    Resources for Hard Times

    If you’re looking for practical help, food support, or community resources, you can visit the Salt, Ink & Soul Resources Page.
    👉 Resources for Hard Times

  • Simple Grilled Chicken for Keto-Style Giardiniera

    Simple Grilled Chicken for Keto-Style Giardiniera

    Servings: 4

    Prep Time: 10 minutes

    Cook Time: 12–15 minutes

    This Simple Grilled Chicken is quietly earning a regular place in my week. It’s seasoned with just a handful of pantry staples, grilled until juicy, and versatile enough to become lunch, dinner, or tomorrow’s meal prep. On its own, it’s delicious. But paired with my Keto-Style Giardiniera, it becomes something special. The bright, tangy vegetables and herb-infused marinade transform a simple piece of chicken into a meal that never feels ordinary.

    I’ve learned that healthy eating isn’t about chasing complicated recipes. It’s about finding a few dependable ones that make you excited to open the refrigerator rather than reach for the drive-thru.

    This is one of those recipes.

    Ingredients

    • 900 g boneless, skinless chicken breasts (about 4 medium breasts)
    • 30 ml extra-virgin olive oil
    • 5 g kosher salt
    • 2 g freshly ground black pepper
    • 5 g garlic powder
    • 5 g Italian seasoning
    • 2 g paprika (optional, for color)

    To Serve

    • Keto-Style Giardiniera
    • 15 ml Keto-Style Giardiniera marinade per serving

    Instructions

    1. If needed, pound the chicken breasts to an even thickness of approximately 2 cm to ensure even cooking.
    2. Pat the chicken dry with paper towels.
    3. In a small bowl, combine the kosher salt, black pepper, garlic powder, Italian seasoning, and paprika.
    4. Brush the chicken evenly with the olive oil, then coat both sides with the seasoning mixture.
    5. Preheat a grill or grill pan over medium-high heat.
    6. Grill the chicken for 6–7 minutes per side, or until the internal temperature reaches 74°C (165°F).
    7. Transfer the chicken to a plate and allow it to rest for 5 minutes before slicing.

    To Serve

    Arrange the sliced chicken on a plate.

    Top with a generous spoonful of Keto-Style Giardiniera, then drizzle approximately 15 ml of the herb-infused giardiniera marinade over the chicken just before serving.

    Serve with Roasted Broccoli with Giardiniera Herb Dressing or your favorite low-carb vegetable for a complete meal.

    Meal Prep Tip

    Grill all four chicken breasts at the beginning of the week and refrigerate them in airtight containers. When you’re ready to eat, simply reheat a chicken breast, top it with Keto-Style Giardiniera, and finish with a drizzle of the marinade.

    Simple meals don’t have to be boring. Sometimes all it takes is one well-seasoned piece of chicken and a jar of something made with care.

    Enjoy.

    Kyle J. Hayes

    kylehayesblog.com

    Please like, comment, and share

    Resources for Hard Times

    If you’re looking for practical help, food support, or community resources, you can visit the Salt, Ink & Soul Resources Page.
    👉 Resources for Hard Times

  • Grilled Zucchini and Summer Squash

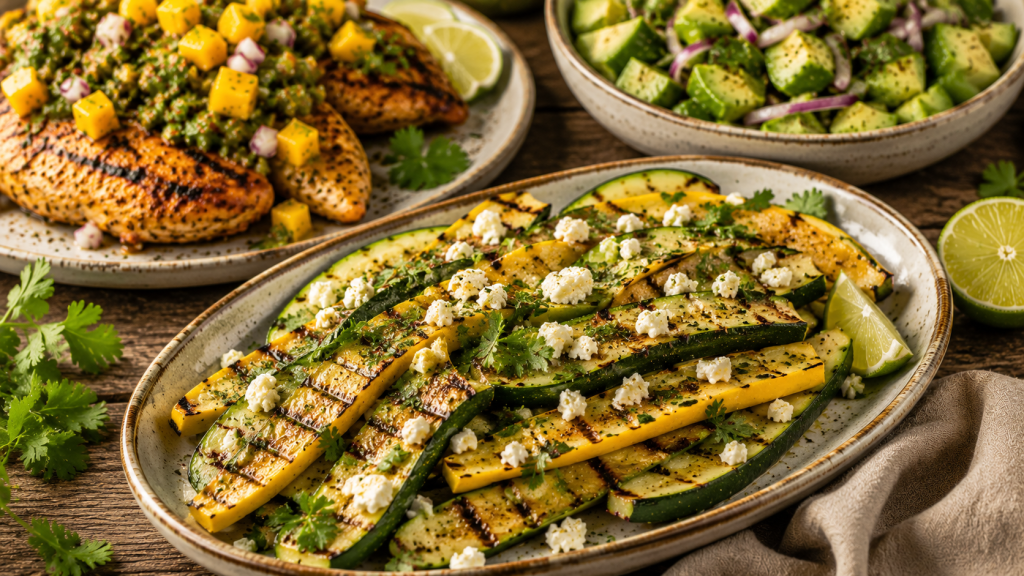
    Grilled Zucchini and Summer Squash

    The Quiet Work of Ordinary Things

    Some ingredients never become famous.

    Nobody waits all year for zucchini season the way they wait for peaches or tomatoes.

    Summer squash rarely becomes the centerpiece of a celebration.

    It doesn’t ask for attention.

    It simply arrives.

    Year after year.

    Garden after garden.

    Kitchen after kitchen.

    Reliable.

    Dependable.

    Quietly doing its work.

    I’ve always admired things that don’t need applause to have value.

    The people who show up every day.

    The neighbor who checks on an elderly friend without anyone knowing.

    The teacher who remembers every student’s name.

    The parent who packs lunches before sunrise.

    The grandparent who somehow makes every meal feel like home.

    Their work is rarely celebrated in headlines.

    But if they disappeared, we’d notice immediately.

    Zucchini reminds me of those people.

    It doesn’t demand the spotlight.

    It simply makes the meal better.

    Sometimes that’s enough.

    Maybe more than enough.

    Grilled Zucchini and Summer Squash

    Serves 4

    Ingredients

    • 2 zucchini, sliced lengthwise
    • 2 yellow summer squash, sliced lengthwise
    • 2 tablespoons extra-virgin olive oil
    • 1 teaspoon garlic powder
    • ½ teaspoon smoked paprika
    • Kosher salt, to taste
    • Freshly ground black pepper, to taste
    • Juice of 1 fresh lime
    • 1 tablespoon chopped fresh parsley
    • 1 tablespoon crumbled feta cheese (optional)

    Instructions

    Step 1: Prepare the Vegetables

    Slice the zucchini and summer squash lengthwise into even planks.

    Brush both sides lightly with olive oil.

    Season with garlic powder, smoked paprika, salt, and black pepper.

    Simple ingredients deserve thoughtful attention.

    Step 2: Grill

    Heat a grill or grill pan over medium-high heat.

    Cook the vegetables for 3 to 4 minutes per side until they are tender but still have a little bite.

    Look for those dark grill marks.

    They’re more than decoration.

    They’re proof that fire, when treated with respect, adds character rather than destroys it.

    Step 3: Finish

    Transfer the vegetables to a serving platter.

    Squeeze fresh lime juice over everything.

    Scatter chopped parsley across the top.

    If you like, finish with a light sprinkle of crumbled feta.

    The feta isn’t there to take over.

    It’s there to remind you that sometimes the smallest finishing touch changes the entire experience.

    Serve With

    This dish pairs beautifully with:

    • Green Chile Mango Salsa Chicken
    • Avocado and Cucumber Salad

    Together they make a colorful, fresh summer dinner that feels satisfying without feeling heavy.

    Sweet.

    Fresh.

    Smoky.

    Bright.

    A plate that tastes like sunshine.

    Closing Thought

    The world has a habit of celebrating whatever is loudest.

    The kitchen teaches a quieter lesson.

    Not everything valuable arrives with fanfare.

    Some things simply keep showing up.

    Again and again.

    Steady.

    Reliable.

    Making everything around them a little better.

    People can be like that.

    So can ingredients.

    If we’re paying attention, both deserve our gratitude.

    And maybe that’s one of the reasons we gather around a table in the first place.

    Not simply to eat.

    But to remember that ordinary things, given care and shared with others, have a remarkable way of becoming unforgettable.

    Kyle J. Hayes

    kylehayesblog.com

    Please like, comment, and share

    Resources for Hard Times

    If you’re looking for practical help, food support, or community resources, you can visit the Salt, Ink & Soul Resources Page.
    👉 Resources for Hard Times

  • Avocado and Cucumber Salad

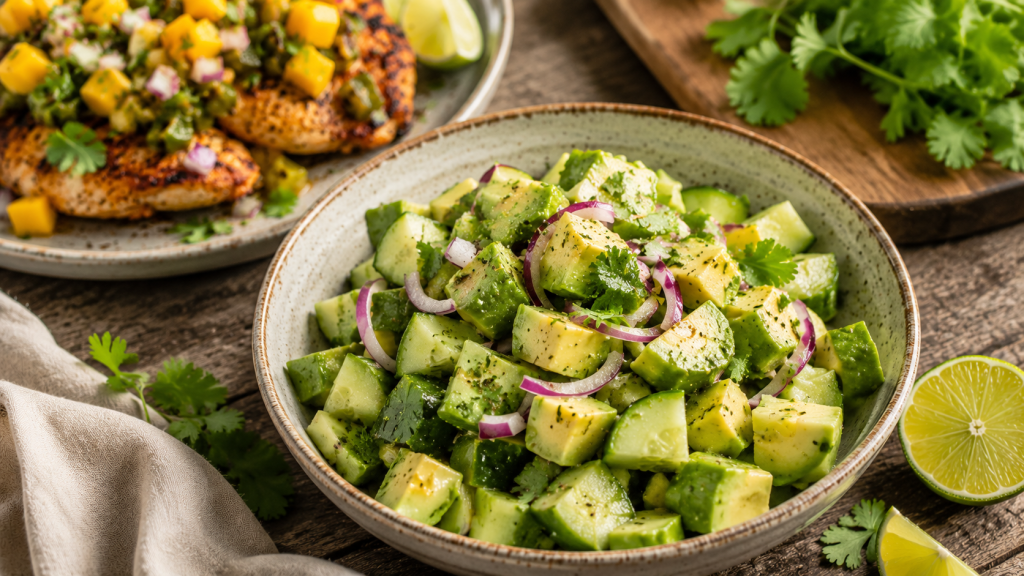
    Avocado and Cucumber Salad

    The Wisdom of Leaving Things Alone

    There is a temptation in cooking to keep adding.

    Another spice.

    Another sauce.

    Another ingredient that promises to improve something.

    Sometimes that instinct serves us well.

    Sometimes it ruins everything.

    The older I get, the more I appreciate restraint.

    A perfectly ripe avocado doesn’t need a committee meeting. A crisp cucumber doesn’t need to be disguised beneath layers of dressing and distraction. Good ingredients often arrive carrying everything they need.

    The real skill is knowing when to stop.

    That lesson extends far beyond the kitchen.

    We spend our lives trying to improve ourselves, improve our circumstances, improve our plans. Yet some of the best moments we experience come when we stop forcing things and simply appreciate what is already in front of us.

    This salad is built on that idea.

    Simple ingredients.

    Clean flavors.

    Nothing is hiding behind anything else.

    Just freshness, balance, and the quiet confidence that comes from knowing enough is enough.

    Avocado and Cucumber Salad

    Serves 4

    Ingredients

    • 2 ripe avocados, diced
    • 1 large cucumber, diced
    • ¼ cup red onion, thinly sliced
    • Juice of 1 lime
    • 1 tablespoon olive oil
    • Salt to taste
    • Freshly ground black pepper to taste
    • 1 tablespoon fresh cilantro, chopped

    Instructions

    Step 1: Prepare the Vegetables

    Dice the avocados into bite-sized pieces.

    Cut the cucumber into similar-sized pieces.

    Thinly slice the red onion.

    Place everything in a large bowl.

    Try not to overthink it.

    Uniformity is overrated.

    Step 2: Dress the Salad

    Add the lime juice, olive oil, cilantro, salt, and black pepper.

    Gently toss everything together.

    The goal is not to mash the avocado into submission.

    Treat it with a little respect.

    Step 3: Taste and Adjust

    Taste.

    Add another squeeze of lime if it needs brightness.

    A little more salt if it feels sleepy.

    Trust your instincts.

    Recipes are suggestions.

    Your tongue is the final authority.

    Step 4: Serve

    Serve immediately while everything is fresh and vibrant.

    This is not a dish that benefits from waiting around.

    Neither do many of life’s best moments.

    What to Serve Alongside

    This salad pairs beautifully with:

    • Green Chile Mango Salsa Chicken
    • Grilled fish
    • Black beans seasoned with garlic and cumin
    • Grilled zucchini and summer squash
    • A simple piece of crusty bread

    Nothing complicated.

    The salad already knows what it is.

    Closing Thought

    There is a strange kind of freedom that comes from realizing not everything needs improvement.

    Some things only need appreciation.

    A ripe avocado.

    A cool cucumber.

    A meal shared with someone you care about.

    An ordinary afternoon that turns out to be memorable for reasons you never saw coming.

    The world encourages us to chase more.

    The kitchen occasionally reminds us to recognize enough.

    And enough, when we’re paying attention, can be a beautiful thing.

    Kyle J. Hayes

    kylehayesblog.com

    Please like, comment, and share

    Resources for Hard Times

    If you’re looking for practical help, food support, or community resources, you can visit the Salt, Ink & Soul Resources Page.

    👉 Resources for Hard Times

  • Green Chile Mango Salsa Chicken

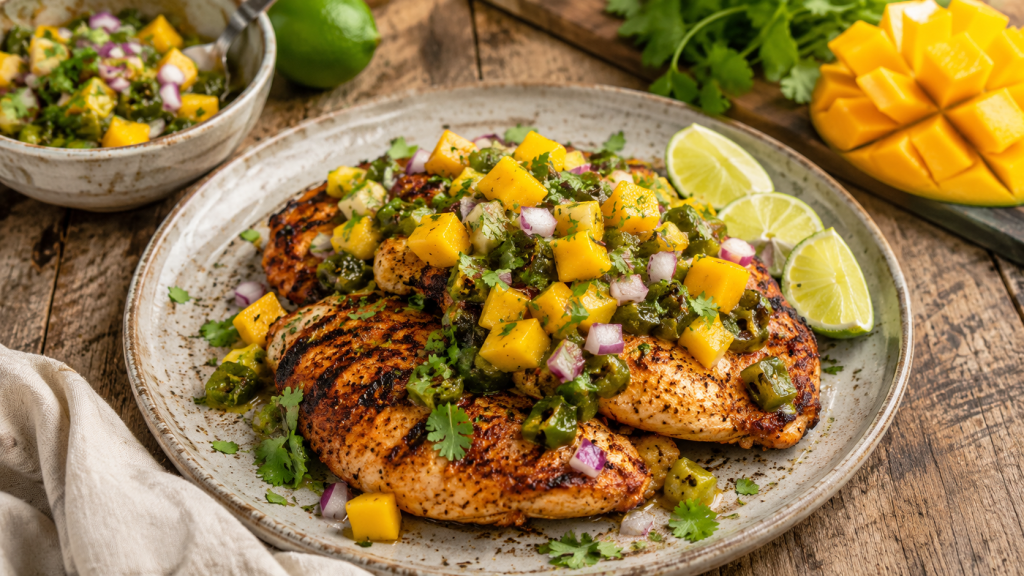
    Green Chile Mango Salsa Chicken

    Healthy Food Doesn’t Have to Be a Punishment

    There was a time when healthy eating got a bad reputation.

    Somewhere along the way, people started believing that taking care of yourself meant giving up joy. Meals became spreadsheets. Flavor became suspicious. Every bite was measured against guilt instead of pleasure.

    That has never made much sense to me.

    Food is one of the few things we do every day that can nourish both the body and the spirit. Why would we willingly strip away the part that makes it worth looking forward to?

    The best meals are not the ones that make you feel deprived. They are the ones that remind you how much goodness can fit on a single plate.

    This is one of those meals.

    The sweetness of ripe mango. The earthy heat of green chile. Smoke from the grill. Fresh lime. A little cilantro. Chicken that stays juicy because you gave it the attention it deserved.

    Nothing complicated.

    Nothing trendy.

    Just ingredients doing what they were meant to do.

    A meal that feels like summer, even when life feels heavy.

    Green Chile Mango Salsa Chicken

    Serves 4

    Ingredients

    For the Chicken

    • 4 boneless, skinless chicken breasts
    • 2 tablespoons olive oil
    • 1 teaspoon smoked paprika
    • 1 teaspoon garlic powder
    • 1 teaspoon onion powder
    • ½ teaspoon ground cumin
    • 1 teaspoon kosher salt
    • ½ teaspoon black pepper
    • Juice of 1 lime

    For the Green Chile Mango Salsa

    • 2 ripe mangoes, diced
    • 1 cup roasted green chiles, chopped
    • ¼ cup red onion, finely diced
    • 2 tablespoons fresh cilantro, chopped
    • Juice of 1 lime
    • Pinch of salt

    Instructions

    Step 1: Season the Chicken

    In a small bowl, combine smoked paprika, garlic powder, onion powder, cumin, salt, and pepper.

    Coat the Chicken with olive oil and lime juice. Sprinkle generously with the seasoning mixture and rub it into every surface.

    Let the chicken rest for at least 20 minutes. Longer if you have the time.

    Good food often begins with patience.

    Step 2: Make the Salsa

    Combine diced mango, green chiles, red onion, cilantro, lime juice, and salt in a bowl.

    Stir gently.

    Taste.

    Then taste again.

    The mango should bring sweetness. Chile should bring warmth. The lime should wake everything up.

    If one ingredient is shouting louder than the others, adjust.

    Cooking is as much about listening as it is about following instructions.

    Step 3: Grill the Chicken

    Preheat a grill or grill pan over medium-high heat.

    Cook the Chicken for about 6–7 minutes per side, depending on thickness, until the internal temperature reaches 165°F.

    Remove from the heat and let it rest for five minutes.

    Do not skip this step.

    A rushed cook often creates dry Chicken and regrets.

    Step 4: Assemble

    Place the Chicken on a serving platter.

    Spoon the green chile mango salsa generously over the top.

    Serve immediately.

    What to Serve Alongside

    This Chicken pairs beautifully with:

    • Avocado and Cucumber Salad
    • Grilled Zucchini and Summer Squash
    • Cilantro-lime cauliflower rice
    • Black beans seasoned with garlic and cumin

    Keep it simple.

    The Chicken is the star.

    Everything else is there to support the performance.

    Closing Thought

    Some meals leave you feeling full.

    Others leave you feeling cared for.

    There is a difference.

    One fills a space.

    The other reminds you that your well-being matters.

    In a world that often encourages shortcuts, drive-thru windows, and eating while distracted, there is something quietly radical about preparing a meal like this.

    You take a few fresh ingredients.

    You give them your attention.

    You sit down and enjoy them without apology.

    That is not dieting.

    That is not deprivation.

    That is care.

    And sometimes care is the healthiest thing we can put on the table.

    Kyle J. Hayes

    kylehayesblog.com

    Please like, comment, and share

    Resources for Hard Times

    If you’re looking for practical help, food support, or community resources, you can visit the Salt, Ink & Soul Resources Page.

    👉 Resources for Hard Times