Category: keto

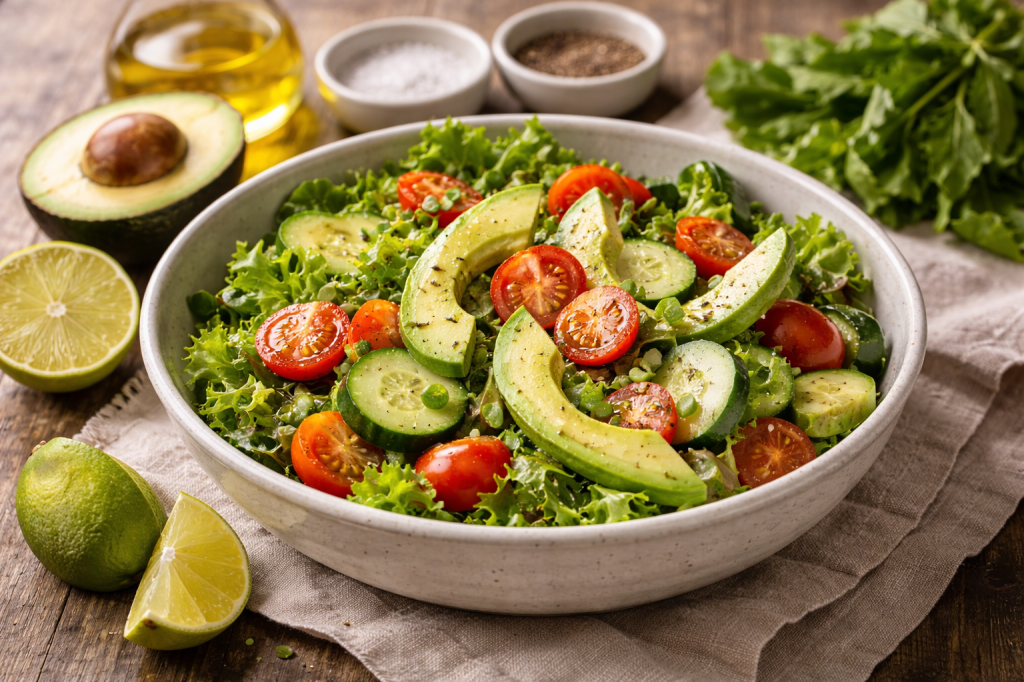
  • Soulful Low-Carb Coleslaw

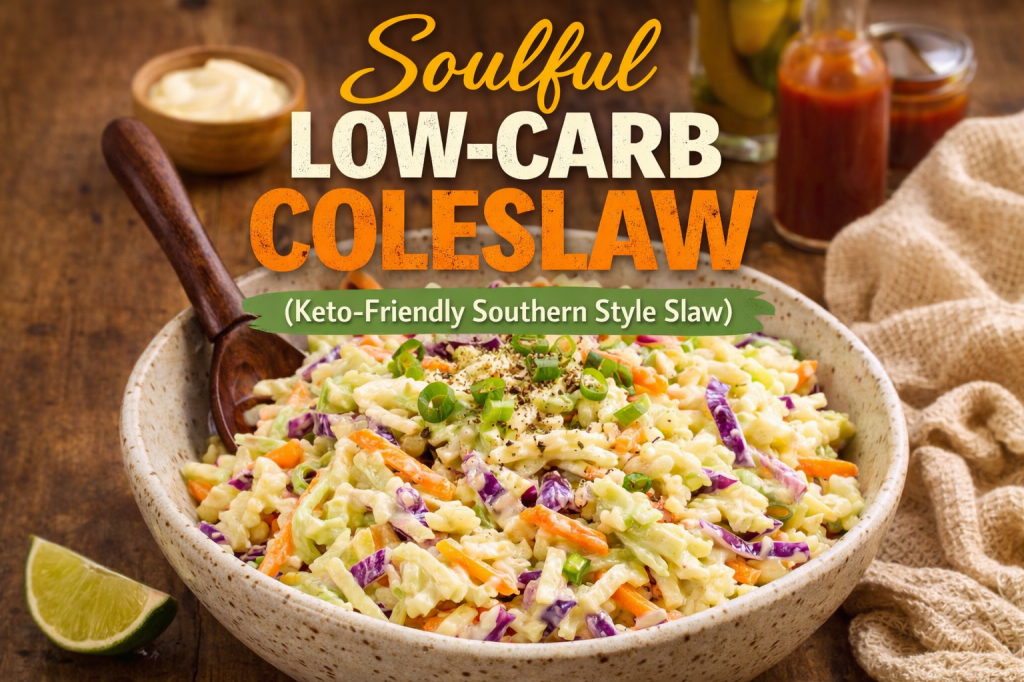
    Soulful Low-Carb Coleslaw

    Cool. Crisp. Familiar, but a little lighter.

    There’s a version of coleslaw most of us know.

    It shows up beside barbecue, next to something hot, something smoky, something meant to be eaten with your hands. It’s cold. A little sweet. A little tangy. Meant to balance everything else on the plate.

    This version keeps that spirit.

    But it pulls back just enough.

    Less sugar. More brightness. A little more edge.

    Still creamy—but not heavy.

    Still familiar—but not stuck.

    Ingredients

    • 4 cups green cabbage, thinly sliced
    • 1 cup purple cabbage, thinly sliced
    • ½ cup carrots, finely shredded (optional, for color—use lightly to keep carbs low)
    • ¼ cup mayonnaise
    • 1 tablespoon apple cider vinegar
    • 1 tablespoon Dijon mustard
    • 1–2 teaspoons low-carb sweetener (to taste, just enough to soften the edges)
    • ½ teaspoon garlic powder
    • ½ teaspoon onion powder
    • ½ teaspoon smoked paprika
    • Salt, to taste
    • Freshly cracked black pepper

    Optional (for depth)

    • 1 teaspoon pickle juice
    • pinch of celery seed

    Instructions

    1. Build the base

    Place the cabbage (and carrots, if using) into a large bowl.

    Give it space. Slaw needs room to move.

    2. Make the dressing

    In a separate bowl, combine:

    • mayonnaise
    • apple cider vinegar
    • Dijon mustard
    • sweetener
    • garlic powder
    • onion powder
    • smoked paprika
    • salt and pepper

    Stir until smooth.

    Taste it.

    It should feel balanced—not too sweet, not too sharp. Adjust if needed.

    3. Bring it together

    Pour the dressing over the cabbage.

    Toss slowly, making sure everything is coated.

    Not drowned. Just coated.

    4. Let it rest

    Let the slaw sit for 15–30 minutes before serving.

    This matters.

    The cabbage softens slightly. The flavors settle.

    It becomes something more than just mixed ingredients.

    To Serve

    Serve cold, beside something warm and rich.

    This is where it does its best work.

    Cutting through heaviness. Resetting the palate.

    Making the next bite feel like the first one again.

    Serve This As a Complete Table

    This slaw belongs beside something that needs balance.

    • Cheeseburger Casserole — warm, rich, and grounding
    • Soulful Low-Carb Coleslaw — crisp, cool, and cutting through
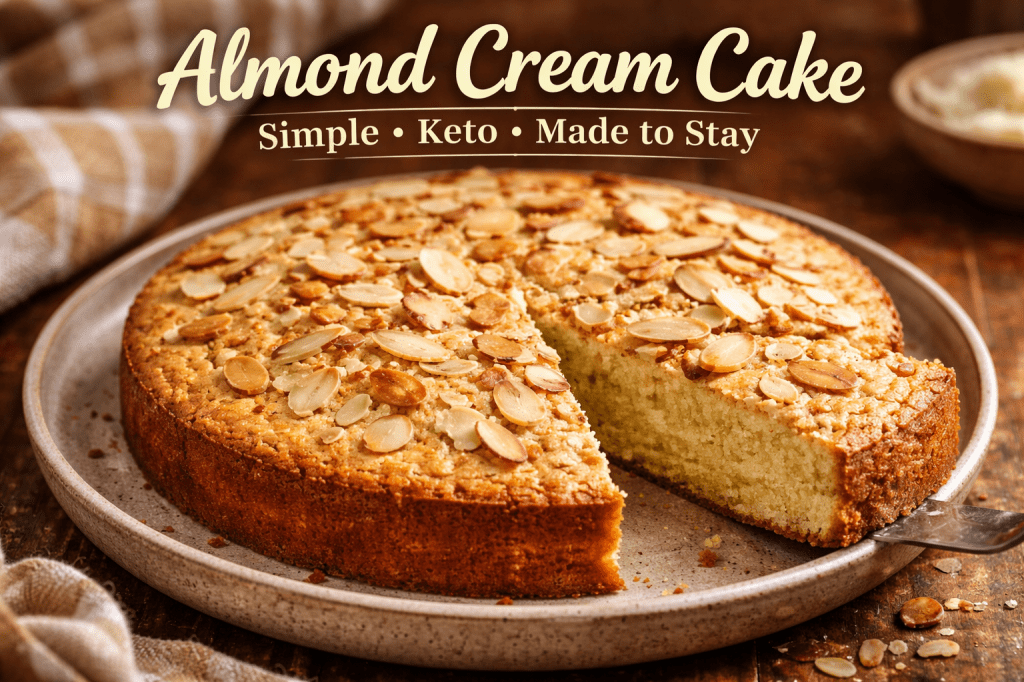
    • Almond Cream Cake — quiet, balanced, and just enough (posting Saturday)

    Together, they hold the table steady.

    Not too heavy.

    Not too sharp.

    Just right.

    Kyle J. Hayes

    kylehayesblog.com

    If this found you at the right time,

    Feel free to like, comment, or share it with someone who might need it too.

    Resources for Hard Times

    If you’re looking for practical help, food support, or community resources, you can visit the Salt, Ink & Soul Resources Page.
    👉 Resources for Hard Times

  • Cheeseburger Casserole

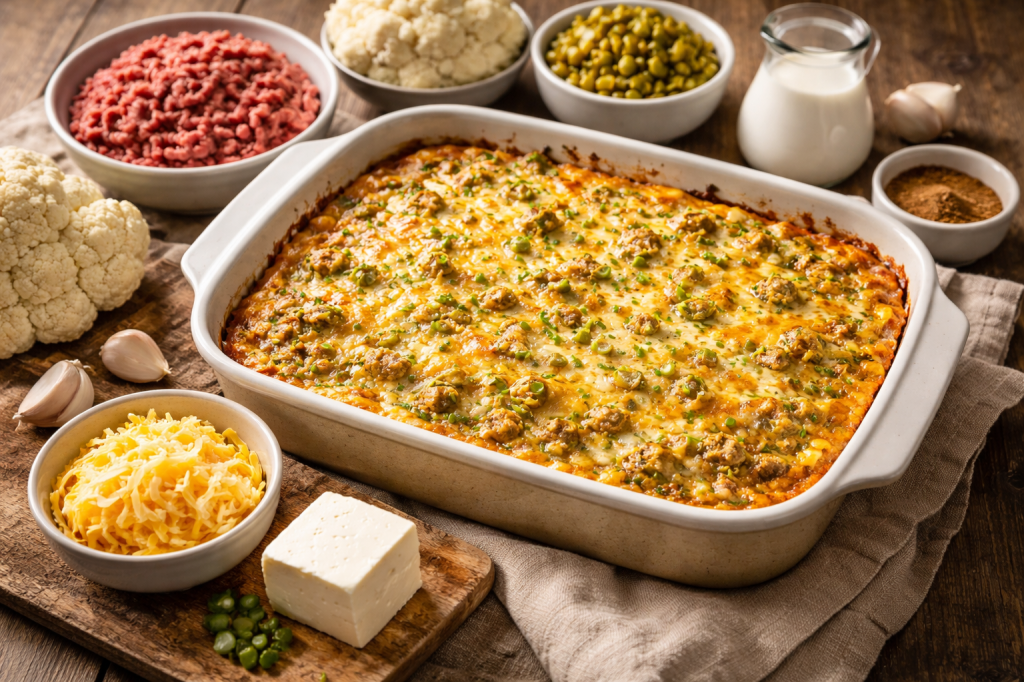
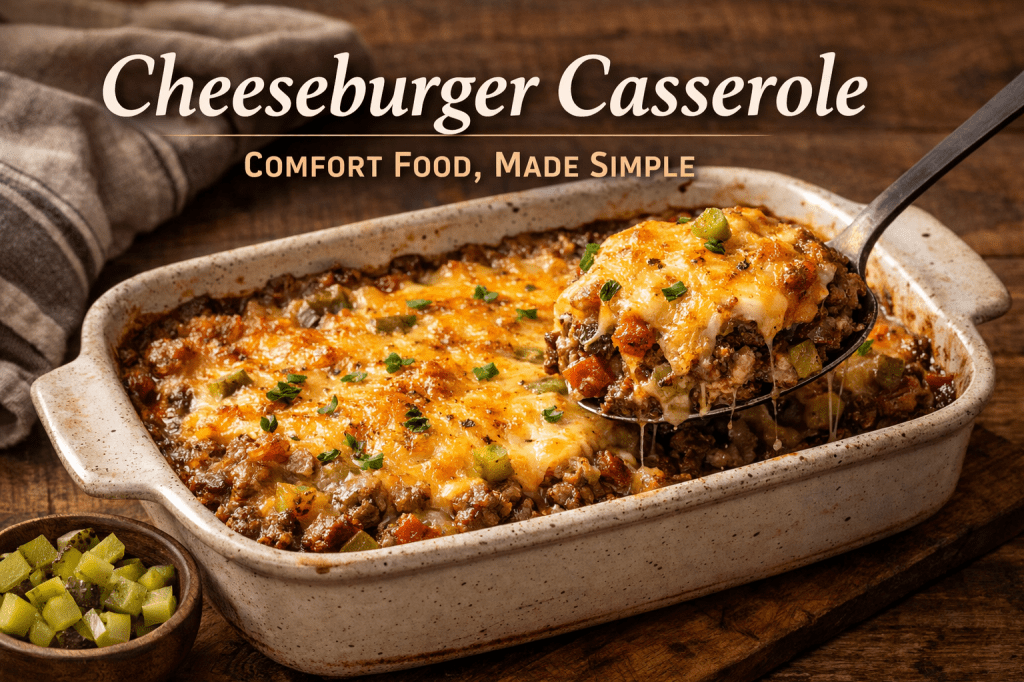
    Cheeseburger Casserole

    A familiar meal, made to be shared

    Some people look at the recipes I make and wonder why they lean so heavily toward casseroles.

    It’s a fair question.

    I eat well when I can. To be mindful. To make choices that feel like they’re moving me in the right direction. But I also love food—real food, the kind that doesn’t pretend to be anything other than what it is.

    This dish comes from something simple. I like cheeseburgers. Always have. The bun… I can take or leave. What stays with me is everything inside it—the beef, the cheese, the sharpness of mustard, the quiet tang of pickles. That’s the part that matters.

    And somewhere along the way, the idea shifted.

    If the bun isn’t necessary, then what’s left?

    Something you can gather. Something you can make once and return to. Something that holds for a few days without losing what made it good in the first place.

    So it became this.

    Not a replacement. Not a shortcut.

    Just another way of holding on to a flavor I wasn’t ready to let go of.

    Cheeseburger Casserole

    Serves

    6–8

    Ingredients

    • 1 pound ground beef
    • 1 small onion, diced
    • 2 cloves garlic, minced
    • Salt and pepper, to taste
    • 1 cup chopped tomatoes
    • 1 cup diced pickles
    • 1 cup shredded cheddar cheese
    • 1 cup shredded mozzarella cheese
    • 1 cup milk
    • 2 eggs
    • 2 tablespoons ketchup
    • 2 tablespoons mustard
    • 1 teaspoon Worcestershire sauce

    Instructions

    1. Preheat the oven

    Set your oven to 350°F (175°C).

    Let it warm slowly. No need to rush it.

    2. Build the base

    In a skillet over medium heat, cook the ground beef with the diced onion and garlic.

    Let it brown. Let the onions soften.

    Season with salt and pepper.

    Drain off any excess fat. What remains should feel clean, not heavy.

    3. Bring in the familiar

    Stir in the chopped tomatoes and diced pickles.

    This is where it starts to feel like something you already know.

    Transfer the mixture to a greased 9×13 baking dish and spread it evenly.

    4. Add the cheese

    Sprinkle the cheddar and mozzarella over the top.

    Nothing precise. Just enough to cover what’s there.

    5. Prepare the sauce

    In a separate bowl, whisk together:

    • milk
    • eggs
    • ketchup
    • mustard
    • Worcestershire sauce

    It won’t look like much yet.

    It doesn’t need to.

    6. Bring it together

    Pour the mixture evenly over the casserole.

    Let it settle into the spaces between everything else.

    7. Bake

    Place the dish in the oven and bake for 25–30 minutes.

    Until the top is melted, slightly golden, and the edges begin to bubble.

    8. Let it rest

    Remove from the oven and let it sit for a few minutes before serving.

    Some meals need that pause.

    This is one of them.

    To Serve

    Serve warm.

    You can finish it with:

    • a few extra diced pickles
    • chopped herbs
    • Or leave it just as it is

    It doesn’t need much.

    Serve This As a Complete Table

    This dish was never meant to stand alone.

    It belongs beside something that brings balance.

    • Low-Carb Coleslaw (coming Friday)
    • Almond Cream Cake  (coming Saturday)

    Together, they create something steady.

    Not heavy.

    Not complicated.

    Just enough.

    Kyle J. Hayes

    kylehayesblog.com

    If this found you at the right time,

    Feel free to like, comment, or share it with someone who might need it too.

    Resources for Hard Times

    If you’re looking for practical help, food support, or community resources, you can visit the Salt, Ink & Soul Resources Page.
    👉 Resources for Hard Times

  • Keto Lemon Pound Cake

    Keto Lemon Pound Cake

    Bright enough to cut through heaviness. Gentle enough for a quiet morning.

    By now, some of you probably know something about me: I have a sweet tooth.

    Not the loud kind that storms the kitchen cabinets or demands dessert after every meal. Mine is quieter than that. It waits. Patiently. Somewhere in the background of the day. It shows up when the work is done, when the house is still, when a cup of coffee is warming your hands, and the world finally slows down enough for you to notice yourself again.

    For a long time, I thought discipline meant denial. Just stop wanting sweet things. Just remove them entirely.

    But life has a way of teaching softer lessons than that.

    Not every hunger is meant to be silenced. Some are meant to be understood. Adjusted. Given a place that doesn’t undo the rest of the life you’re trying to build.

    That’s part of why so many keto desserts show up in my kitchen. They aren’t about indulgence the way desserts used to be. They’re about balance. A small act of kindness toward yourself without abandoning the discipline you worked hard to build.

    This lemon pound cake is one of those small compromises with myself.

    Bright with lemon. Rich with butter. Just sweet enough to sit beside a Sunday morning cup of coffee while the day wakes up slowly.

    Trust me.

    It works.

    Ingredients

    • 2½ cups almond flour
    • Almond flour replaces traditional flour, creating a tender crumb with a slightly nutty flavor.
    • 1 cup erythritol
    • A low-carb sweetener that behaves like sugar in baking without the carb load.
    • 1 teaspoon baking powder
    • Helps the cake rise and stay light despite the absence of gluten.
    • ½ teaspoon salt
    • The quiet ingredient that makes everything else taste more like itself.
    • 1 cup unsalted butter, softened
    • This is still a pound cake. Butter gives it richness and moisture.
    • 4 large eggs
    • Eggs build the structure of the cake while adding richness.
    • Zest from 2 lemons
    • This is where the cake gets its lemon personality.
    • ¼ cup fresh lemon juice
    • Bright acidity that balances the richness of the butter.
    • 1 teaspoon vanilla extract
    • A soft background note that rounds out the flavor.
    • ¼ cup unsweetened almond milk
    • Loosens the batter slightly without adding unnecessary carbs.

    Instructions

    1. Preheat and Prepare

    Preheat your oven to 350°F (175°C).

    Grease a 9×5-inch loaf pan and lightly dust it with almond flour so the cake releases easily later.

    A small step. But it saves a lot of regret.

    2. Mix the Dry Ingredients

    In a medium bowl, whisk together:

    • almond flour
    • erythritol
    • baking powder
    • salt

    Mixing these first ensures the rise and sweetness are evenly distributed.

    3. Cream the Butter and Eggs

    In a separate bowl, cream the softened butter until it becomes light and fluffy.

    This step builds air into the batter, which helps create a better texture.

    Add the eggs one at a time, mixing well after each addition.

    Then stir in:

    • lemon zest
    • lemon juice
    • vanilla extract

    At this point, the batter begins to smell like sunlight.

    4. Combine the Batter

    Gently fold the dry ingredients into the wet mixture.

    Do this slowly. Almond flour doesn’t respond well to aggressive mixing.

    Once combined, stir in the almond milk until the batter becomes smooth and pourable.

    5. Bake

    Pour the batter into the prepared loaf pan and smooth the top.

    Bake for 45–50 minutes, or until:

    • The top is golden
    • A toothpick inserted in the center comes out clean

    Your kitchen will smell bright and warm long before the timer ends.

    6. Cool

    Allow the cake to cool in the pan for 15 minutes.

    Then transfer it to a wire rack to cool completely.

    Patience here keeps the crumb intact.

    Optional Keto Lemon Glaze

    If you’d like an extra touch of lemon:

    Ingredients

    • ½ cup powdered erythritol
    • 1–2 tablespoons lemon juice

    Whisk together until smooth and drizzle over the cooled cake.

    It’s not necessary.

    But sometimes a little brightness on top feels right.

    Notes from the Kitchen

    • Store covered at room temperature for 2 days or refrigerate up to 5 days.
    • The flavor deepens the next day slightly.
    • A lightly toasted slice with coffee in the morning feels surprisingly indulgent for something this simple.

    Sometimes discipline isn’t about saying no.

    Sometimes it’s about learning how to say yes — just a little differently.

    And sometimes that difference looks like a slice of lemon pound cake beside a quiet cup of coffee.

    If you’re wondering what that cup of coffee might look like, I wrote something about that once.

    You can read it here:

    The Quest for The Perfect Cup of Coffee

    Kyle J. Hayes

    kylehayesblog.com

    Please like, comment, and share

    Resources for Hard Times

    If you’re looking for practical help, food support, or community resources, you can visit the Salt, Ink & Soul Resources Page.
    👉 Resources for Hard Times

  • Grilled Peaches with Vanilla Ice Cream

    Grilled Peaches with Vanilla Ice Cream

    A simple dessert for warm evenings

    Some meals try to impress.

    They arrive loudly. Layered. Overbuilt. Asking to be admired before they’re even tasted.

    But not every meal is meant for that.

    Some are quieter.

    Earlier in the evening, the table held something warm and steady. A casserole—rich, comforting, the kind of dish that asks only to be shared. Nothing delicate about it. Just food that does what it’s supposed to do.

    Beside it sat something different. Crisp cucumber. Lime. Fresh herbs. A small bowl of brightness that cut through the weight of everything else. A reminder that balance matters.

    And now, at the end of it all, something softer.

    Something warm again—but lighter this time.

    Something sweet, but not heavy.

    A peach, placed on heat, and given just enough time to become something more than it was.

    This is how the meal closes.

    Grilled Peaches with Vanilla Ice Cream

    Serves

    4

    Ingredients

    • 4 ripe peaches
    • 2 tablespoons butter, melted
    • 2 tablespoons brown sugar
    • ½ teaspoon cinnamon
    • 1 teaspoon vanilla extract
    • 4 scoops vanilla ice cream

    Optional finish

    • drizzle of honey
    • toasted chopped pecans
    • fresh mint leaves

    Instructions

    1. Prepare the peaches

    Cut the peaches in half and remove the pits.

    Brush the cut sides lightly with melted butter.

    Not too much. Just enough to help them along.

    2. Heat the grill

    Preheat a grill or grill pan to medium heat.

    Place the peaches cut-side down.

    Let them cook for 3–4 minutes, until grill marks appear and the fruit begins to soften.

    Turn and cook another 2 minutes.

    You’re not trying to break them down.

    Just warm them. Wake them up.

    3. Add the sweetness

    Mix together:

    • brown sugar
    • cinnamon
    • vanilla

    While the peaches are still warm, sprinkle the mixture over them.

    It will melt slightly into the surface.

    Nothing forced. Just enough.

    4. Serve

    Place the peaches in a bowl.

    Add a scoop of vanilla ice cream beside them.

    Let it melt slowly into the fruit.

    That becomes the sauce.

    Finish, if you like, with:

    • a drizzle of honey
    • a few toasted pecans
    • or a little fresh mint

    Serve This As a Complete Table

    This dessert was never meant to stand alone.

    It belongs at the end of a table built on contrast.

    Together, they create something balanced.

    Not heavy.

    Not complicated.

    Just complete.

    Kyle J. Hayes

    kylehayesblog.com

    If this found you at the right time,

    Feel free to like, comment, or share it with someone who might need it too.

    Resources for Hard Times

    If you’re looking for practical help, food support, or community resources, you can visit the Salt, Ink & Soul Resources Page.
    👉 Resources for Hard Times

  • Lime Cucumber & Herb Salad

    Lime Cucumber & Herb Salad

    A bright, cooling counterpoint to a rich meal.

    Some meals need contrast.

    When the table holds something warm, rich, and comforting—like a bubbling casserole layered with cheese and spices—there should be something nearby that feels like opening a window.

    Something crisp.

    Something bright.

    Something that reminds your palate what fresh tastes like.

    This Lime Cucumber & Herb Salad is exactly that.

    Thin slices of cucumber. Peppery radish. Fresh cilantro. Lime juice that wakes everything up. Olive oil to soften the edges. And just a pinch of flaky sea salt, sitting on the vegetables like tiny sparks of flavor.

    It’s simple food.

    But sometimes the simplest things are what make a meal feel complete.

    Ingredients

    • 2 large cucumbers, thinly sliced
    • 4–5 radishes, thinly sliced
    • ¼ cup fresh cilantro, roughly chopped
    • Juice of 1 fresh lime
    • 2 tablespoons olive oil
    • ½ teaspoon flaky sea salt (such as Maldon)
    • ¼ teaspoon freshly cracked black pepper

    Instructions

    1. Prepare the vegetables

    Thinly slice the cucumbers and radishes.

    Place them in a large bowl where they have room to move. Salads like this benefit from space.

    2. Add the herbs

    Scatter the chopped cilantro over the vegetables.

    The scent alone should already feel like the start of something fresh.

    3. Dress the salad

    Drizzle the lime juice and olive oil over the mixture.

    Toss gently so every slice picks up a little brightness and a little richness.

    4. Season

    Sprinkle the flaky sea salt and cracked black pepper over the salad.

    Toss lightly again.

    That flaky salt resting on the cucumber is one of those small kitchen pleasures that feels almost unfairly good.

    5. Let it rest briefly

    Allow the salad to sit for 5–10 minutes before serving.

    The salt will draw a little moisture from the cucumbers, and the lime will mingle with it to create a light, natural dressing.

    Patience rewards simple food.

    To Serve

    Serve cold beside a warm dish like Keto Chicken Ranch Casserole.

    The crisp cucumbers and sharp lime will cut through the richness and reset the palate between bites.

    The result is balance.

    Warm and cool.

    Rich and bright.

    Comfort and freshness sharing the same table.

    A Short Reflection

    Not every dish on a table needs to be the star.

    Some exist simply to make the others shine.

    This salad does exactly that.

    And sometimes that quiet role is the one that makes the meal feel whole.

    Kyle J. Hayes

    kylehayesblog.com

    Please like, comment, and share

    Resources for Hard Times

    If you’re looking for practical help, food support, or community resources, you can visit the Salt, Ink & Soul Resources Page.
    👉 Resources for Hard Times

  • Keto Chicken Ranch Casserole

    Keto Chicken Ranch Casserole

    A casserole for the nights when something warm and steady feels necessary.

    Some meals impress people.

    And then some meals hold people together.

    Casseroles have always belonged to that second category. They aren’t delicate food. They aren’t trying to prove anything. They’re the kind of dish that fills the house with the smell of onions softening in butter and spices warming slowly in a pan. The kind of meal that tells you—before the first bite—that tonight you’re going to be alright.

    This Keto Chicken Ranch Casserole leans low-carb, but the spirit of the dish remains the same: layers of tortillas, a slow-built sauce, and enough cheese to bring everything together into something comforting and unapologetically generous.

    The kind of food you make when people are coming over.

    Or when they aren’t.

    Sometimes you cook like this simply because you deserve something warm.

    Ingredients

    • 1 store-bought rotisserie chicken, meat removed and shredded (about 3 cups)
    • 1 cup chicken broth
    • 2 tablespoons butter
    • ½ small onion, diced
    • 1 medium red bell pepper, diced
    • 1 tablespoon chili powder
    • 1 teaspoon cumin
    • 1 teaspoon garlic salt
    • 4 oz can chopped green chile
    • 6 oz tomato salsa
    • ½ cup heavy cream
    • ⅓ cup sour cream
    • 16 oz grated jack cheese
    • 6–7 low-carb or homemade tortillas

    (This casserole makes about 12 servings with approximately 356 calories per serving.)

    Instructions

    1. Prepare the chicken

    Remove the meat from the rotisserie chicken and shred or chop it into bite-sized pieces. Set aside about 3 cups of meat for the casserole.

    If you have a little extra, save it for sandwiches or tomorrow’s lunch.

    2. Build the base

    Melt 2 tablespoons of butter in a skillet over medium-low heat.

    Add the diced onion and bell pepper and cook slowly until softened, about 5 minutes.

    The kitchen will begin to smell like dinner.

    3. Wake up the spices

    Add the chili powder, cumin, and garlic salt.

    Stir them into the vegetables and cook for about 3 minutes, allowing the spices to bloom in the butter.

    This is where the dish’s depth begins.

    4. Deglaze the pan

    Pour in the chicken broth, stirring and scraping the bottom of the pan to incorporate all the flavor into the sauce.

    5. Build the sauce

    Add:

    • heavy cream
    • chopped green chile
    • salsa

    Stir well.

    Cover and let the sauce simmer gently for 15 minutes, stirring occasionally.

    Good sauces take their time.

    6. Thicken the mixture

    Carefully remove 1½ cups of the hot mixture and blend it until smooth.

    Return the blended mixture to the pan and stir until the sauce thickens.

    7. Add the chicken

    Stir in the sour cream, then add the shredded rotisserie chicken.

    Mix until the chicken is fully coated in the sauce.

    At this point, the casserole filling should look rich, creamy, and deeply seasoned.

    8. Prepare the casserole

    Preheat the oven to 350°F (175°C).

    Spread a small amount of the chicken mixture in the bottom of a 9×13 baking dish.

    Place the tortillas across the bottom, tearing pieces as needed to fill the gaps.

    9. Build the layers

    Add:

    • half of the chicken mixture
    • half of the shredded jack cheese

    Repeat with:

    • tortillas
    • remaining chicken mixture
    • remaining cheese

    Layering like this turns simple ingredients into something that feels almost ceremonial.

    10. Bake

    Bake at 350°F for 30 minutes, until the cheese is melted and bubbling.

    Remove from the oven and let it rest 10 minutes before serving.

    Casseroles need a moment to gather themselves.

    To Serve

    Spoon generous portions onto plates.

    If you like, add a little extra sour cream on top.

    Sit down.

    Take a breath.

    Eat slowly.

    Meals like this were never meant to be rushed.

    A Short Reflection

    Some dishes exist because someone long ago needed to stretch what they had.

    Chicken. Tortillas. Cheese. A sauce built more on patience than luxury.

    And somewhere along the way, that act of stretching became comfort.

    That’s the quiet truth about casseroles.

    They are not glamorous foods.

    They are care disguised as dinner.

    And sometimes that’s the most honest kind of cooking there is.

    Kyle J. Hayes

    kylehayesblog.com

    Please like, comment, and share

    Resources for Hard Times

    If you’re looking for practical help, food support, or community resources, you can visit the Salt, Ink & Soul Resources Page.
    👉 Resources for Hard Times

  • Creamy Tuscan Garlic Chicken Casserole (Keto)

    Creamy Tuscan Garlic Chicken Casserole (Keto)

    A warm, quiet kind of comfort from the oven.

    Some meals feel like they belong to a particular moment.

    A long day.

    A tired evening.

    A kitchen that’s quieter than it was earlier.

    This is the kind of dish that fits there.

    Chicken, garlic, cream, Spinach — simple ingredients that don’t ask for much attention but still manage to come together into something deeply comforting. The garlic wakes everything up. The Parmesan deepens the flavor. The sun-dried tomatoes bring just enough brightness to cut through the richness of the Cream.

    And because the ingredients stay low in carbohydrates, the whole dish fits comfortably within a keto way of eating.

    Nothing complicated.

    Just a casserole that comes out of the oven bubbling gently around the edges while the kitchen fills with the smell of garlic and Cream.

    Sometimes that’s exactly the kind of dinner the day calls for.

    Creamy Tuscan Garlic Chicken Casserole

    Keto • Low Carb

    Servings: 4

    Ingredients

    Chicken Breasts — 4, cooked and sliced

    The heart of the dish. Leftover roasted or grilled chicken works beautifully here.

    Fresh Spinach — 2 cups

    Spinach wilts quickly, adding a soft, earthy balance to the Cream.

    Sun-Dried Tomatoes — ½ cup, chopped.

    A small burst of sweetness and acidity that keeps the sauce from feeling too heavy.

    Heavy Cream — 2 cups

    This becomes the body of the sauce — rich, smooth, and deeply comforting.

    Parmesan Cheese — 1 cup, grated

    Sharp, salty, and full of flavor. Parmesan gives the sauce its depth.

    Garlic — 4 cloves, minced

    Garlic is the quiet backbone of this dish.

    Salt and Freshly Ground Black Pepper — to taste

    Optional but recommended:

    1 cup shredded mozzarella for topping — adds a golden finish when baked.

    Instructions

    1. Preheat the oven.

    Preheat your oven to 375°F (190°C).

    Lightly grease a casserole dish and set it aside.

    2. Sauté the Garlic and Spinach

    In a skillet over medium heat, sauté the minced garlic for about 30 seconds, just until fragrant.

    Add the Spinach and cook until it wilts and softens.

    3. Build the Cream Sauce

    Pour the heavy Cream into the skillet and stir gently.

    Add the grated Parmesan and simmer the mixture slowly until the sauce begins to thicken.

    Season with salt and freshly ground black pepper.

    The sauce should feel rich but still pourable.

    4. Assemble the Casserole

    Arrange the sliced chicken evenly across the bottom of the casserole dish.

    Scatter the chopped sun-dried tomatoes over the chicken.

    Pour the warm cream sauce over everything, allowing it to settle into the spaces between the chicken pieces.

    If using mozzarella, sprinkle it across the top.

    5. Bake

    Place the casserole in the oven and bake for 25–30 minutes, until the sauce is bubbling gently around the edges and the top begins to turn lightly golden.

    Let it rest for a few minutes before serving.

    Notes From the Kitchen

    This is one of those dishes that reheats beautifully the next day.

    The sauce thickens slightly overnight, and the flavors settle into one another, making the second serving feel even better than the first.

    A few simple additions work nicely if you feel like changing it up:

    • sautéed mushrooms

    • roasted cauliflower

    • a small pinch of red pepper flakes

    But the truth is, it doesn’t really need much.

    Chicken.

    Garlic.

    Cream.

    A quiet dinner that asks very little from you and still manages to feel like comfort.

    Later this week, I’ll share the simple tomato salad and rustic focaccia that often accompany this dish on my table.

    Kyle J. Hayes

    kylehayesblog.com

    Please like, comment, and share

    Resources for Hard Times

    If you’re looking for practical help, food support, or community resources, you can visit the Salt, Ink & Soul Resources Page.
    👉 Resources for Hard Times

  • Keto Chicken Alfredo

    Keto Chicken Alfredo

    Comfort without collapse

    Some people say keto is restrictive.

    I thought that too.

    When I first started, everything felt like subtraction. No pasta. No bread. No familiar weight on the plate. So I did what most of us do — I searched for substitutes. Some worked. Some didn’t. Some felt like pretending.

    But every now and then, something lands.

    This is one of those times.

    What I realized is this: Alfredo was never about the pasta. It was about the cream. The garlic. The Parmesan. The warmth. The fullness.

    Zucchini and spaghetti squash aren’t replacements.

    Their structure.

    This isn’t about restriction.

    It’s about learning what actually matters.

    Why This Version Works

    • Seasoned chicken, not plain protein
    • Real cream and real Parmesan
    • Vegetables that support instead of compete
    • Richness without excess

    Comfort stays.

    Heaviness doesn’t.

    Recipe Details

    Serves: 4

    Prep Time: 15 minutes

    Cook Time: 25 minutes

    Total Time: About 40 minutes

    Ingredients

    For the Chicken

    • 4 boneless, skinless chicken breasts
    • 1 tsp salt
    • 1 tsp black pepper
    • 2 tbsp olive oil

    For the Alfredo Sauce

    • 3 tbsp unsalted butter
    • 2 cloves garlic, minced
    • 1 cup heavy cream
    • 1 cup freshly grated Parmesan cheese
    • Salt and black pepper, to taste

    For the Base

    • 2 medium zucchinis, spiralized
    • or
    • 1 medium spaghetti squash

    Garnish

    • Chopped parsley
    • Additional grated Parmesan

    Instructions

    1. Cook the chicken

    Pat the chicken dry and season evenly with salt and pepper.

    Heat olive oil in a skillet over medium heat.

    Cook 5–7 minutes per side, depending on thickness, until golden and cooked through (internal temperature of 165°F).

    Do not overcook.

    Moisture is part of the experience.

    Remove and let rest before slicing.

    2. Build the sauce

    In a saucepan, melt butter over medium heat.

    Add garlic and cook just until fragrant — about 1 minute.

    Pour in the heavy cream and bring to a gentle simmer.

    Cook 4–5 minutes, until slightly thickened.

    Lower the heat and stir in Parmesan until smooth.

    Season to taste.

    The sauce should coat the back of a spoon.

    Don’t drown it.

    3. Prepare the base

    For zucchini:

    Sauté lightly in olive oil for 2–3 minutes until just tender. Do not overcook.

    For spaghetti squash:

    Roast at 400°F for 35–40 minutes. Scrape into strands.

    Both should hold their shape.

    4. Bring it together

    Slice the rested chicken.

    Plate the zucchini or squash.

    Lay the chicken over the top.

    Spoon the Alfredo sauce with intention.

    Finish with parsley and Parmesan.

    To Serve

    Serve hot.

    Serve simply.

    No need to explain that it’s keto.

    Let the plate speak.

    This is not food that apologizes.

    It’s food that adapts.

    And sometimes, that’s enough.

    Kyle J. Hayes

    kylehayesblog.com

    Please like, comment, and share

    Resources for Hard Times

    If you’re looking for practical help, food support, or community resources, you can visit the Salt, Ink & Soul Resources Page.
    👉 Resources for Hard Times

  • Blueberry Tea Cake (Keto)

    Blueberry Tea Cake (Keto)

    A quiet answer to a loud craving

    I love sweets.

    They are my weakness.

    If I don’t have something close by to answer that craving, I will go to the store and buy far more than I need. Not because I’m hungry — because I’m reaching. Reaching for comfort. For reward. For something easy.

    So I’ve learned to keep something like this around.

    A cake that satisfies without unraveling discipline. Something measured. Something made with intention. Something that understands restraint.

    Tea cake has always lived in the in-between — not quite dessert, not quite breakfast. Something you slice in the afternoon when the house is quiet. Something that doesn’t need frosting to feel complete.

    This version keeps that spirit. It trades flour for almond flour. Sugar for monkfruit. It leans into blueberries and a touch of lemon for brightness. It isn’t trying to be indulgent. It’s trying to be enough.

    Sweet. Light. Steady.

    Why This Version Works

    • Low carb without tasting compromised
    • Almond flour keeps it tender
    • Blueberries bring natural sweetness and contrast
    • Lemon zest lifts everything quietly

    This is not a cake that shouts.

    It waits.

    Recipe Details

    Serves: 8

    Prep Time: 10 minutes

    Bake Time: 25–30 minutes

    Total Time: About 40 minutes

    Ingredients

    • 2 cups almond flour
    • ¾ cup monkfruit sweetener
    • 1 tsp baking powder
    • Pinch of salt
    • ½ cup unsalted butter, melted
    • 3 large eggs
    • 1 tsp vanilla extract
    • ½ cup unsweetened almond milk
    • 1 cup blueberries (fresh or frozen)
    • 1 tbsp lemon zest (optional, but recommended)

    Instructions

    1. Prepare the oven

    Preheat oven to 350°F (175°C).

    Grease or line an 8-inch cake pan.

    2. Combine the dry ingredients

    In a bowl, whisk together:

    • almond flour
    • monkfruit sweetener
    • baking powder
    • salt

    Set aside.

    3. Mix the wet ingredients

    In a separate bowl, whisk:

    • melted butter
    • eggs
    • vanilla
    • almond milk

    The mixture should look smooth and cohesive.

    4. Bring it together

    Add the wet ingredients to the dry.

    Stir gently until just combined.

    Do not overmix.

    Tenderness lives in restraint.

    5. Fold in the blueberries

    Gently fold in the blueberries and lemon zest.

    Move slowly. Keep the batter light.

    6. Bake

    Pour the batter into the prepared pan and smooth the top.

    Bake for 25–30 minutes, or until the top is lightly golden and a toothpick inserted in the center comes out clean.

    7. Rest

    Let the cake cool in the pan for 10 minutes before transferring to a wire rack.

    Cooling allows the structure to settle.

    To Serve

    Slice simply.

    Serve plain, or with a spoonful of lightly sweetened whipped cream.

    Keep it modest.

    This isn’t cake for spectacle.

    It’s cake for steadiness.

    Notes

    • Frozen blueberries work well — do not thaw first
    • If the top browns too quickly, tent loosely with foil
    • Stores covered at room temperature for 2 days or refrigerated up to 5 days

    Kyle J. Hayes

    kylehayesblog.com

    Please like, comment, and share

    Resources for Hard Times

    If you’re looking for practical help, food support, or community resources, you can visit the Salt, Ink & Soul Resources Page.

    👉 Resources for Hard Times