Tag: meal prep

  • The Rice Cooker Was Up There the Whole Time

    The Rice Cooker Was Up There the Whole Time

    I have written before about my air fryer and its role in my ongoing battle against kitchen heat.

    When it is hot outside, I have very little interest in making it hotter inside.

    There are meals worth suffering for.

    There are also days when I don’t particularly feel like suffering for dinner.

    The air fryer became one of my weapons in that fight. It lets me cook something good without turning on the oven and making the kitchen feel like somewhere I immediately regret being.

    But lately, I have recruited another appliance.

    My rice cooker.

    The funny thing is, it was already here.

    It had been sitting on top of my kitchen cabinets for who knows how long, quietly watching me complain about the heat while apparently knowing it could have helped the entire time.

    I just wasn’t really using it.

    I had always thought of a rice cooker as exactly what the name says it is.

    You put rice in.

    You put water in.

    You push a button.

    Rice comes out.

    Useful, certainly.

    Exciting, not particularly.

    Then the YouTube algorithm did what the YouTube algorithm does.

    You watch one video.

    Then another appears.

    Then another.

    Before long, I started seeing people making entire meals in rice cookers.

    Not just rice.

    Chicken.

    Vegetables.

    Seasonings.

    Sauces.

    Everything going into one pot and coming out as dinner.

    I looked up at the top of my cabinets.

    Apparently, I had been underestimating an employee.

    The Beauty of One Pot

    There is something deeply appealing to me about a meal that doesn’t require much ceremony.

    Maybe that comes from getting older.

    Maybe it comes from cooking enough meals to understand that good food doesn’t always need to announce how hard you worked to make it.

    Sometimes you want to chop a few things, put them into a pot, push a button, and go about your business.

    Especially when it is hot.

    And especially when you are meal prepping.

    That was the other thing that caught my attention.

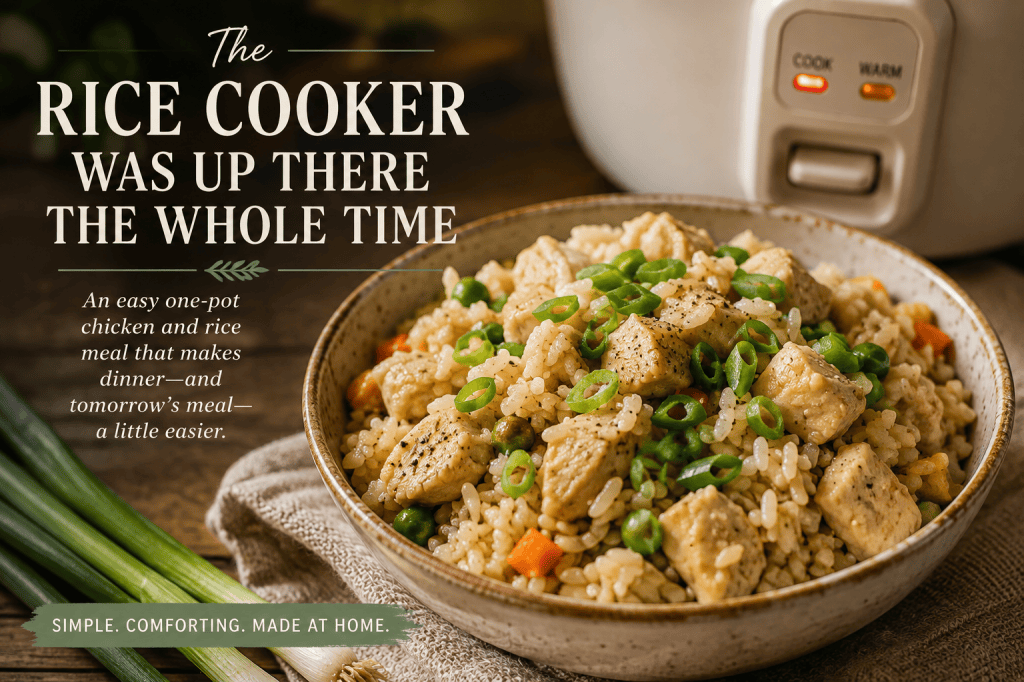
    One cup of uncooked rice becomes roughly three cups once cooked. Add a chicken breast, some seasoning, and green onion, and suddenly I have about three portions of food without dirtying three pans or spending an hour standing over the stove.

    There is something satisfying about that kind of efficiency.

    Not the efficiency of eating something you don’t particularly want simply because it is convenient.

    The efficiency of making actual food convenient.

    I think there is a difference.

    I still want dinner to taste like somebody cared about it.

    Even when the somebody is me.

    Rice Cooker Chicken & Rice with Green Onion

    Makes approximately 3 servings

    This is deliberately simple.

    It isn’t supposed to be the kind of recipe that sends you searching three grocery stores for an ingredient you will use once and then discover in the back of the cabinet two years from now.

    Most of this is probably already somewhere in the kitchen.

    Ingredients

    • 1 cup uncooked white rice, rinsed
    • 1 boneless, skinless chicken breast, cut into small bite-size pieces
    • 2 cups chicken broth or water (or the amount recommended on your rice package)
    • 1 tablespoon soy sauce
    • 1 teaspoon sesame oil
    • 1 teaspoon honey or brown sugar, optional
    • ½ teaspoon garlic powder
    • ¼ teaspoon onion powder
    • ½ teaspoon ground ginger, optional
    • Black pepper to taste
    • 2 green onions, thinly sliced
    • ½–1 cup frozen peas and carrots, optional

    Directions

    1. Prepare the green onions.

    Slice the green onions and separate the white and light-green portions from the darker green tops.

    Add the lighter portions to the rice cooker. Save those beautiful dark-green pieces for the end.

    2. Make the sauce.

    Pour the chicken broth into the rice cooker.

    Add the soy sauce, sesame oil, honey or brown sugar, garlic powder, onion powder, ginger, and a little black pepper.

    Give everything a quick stir.

    3. Add the rice.

    Add the rinsed rice to the liquid and gently stir it once so everything is evenly distributed.

    4. Add the chicken.

    Spread the uncooked chicken pieces evenly over the rice.

    Sprinkle the white and light-green portions of the green onions over everything.

    Close the lid.

    5. Push the button.

    Use your rice cooker’s normal white-rice setting.

    Then leave it alone.

    This may actually be the most difficult part of the recipe.

    There is a temptation when cooking to keep looking at things.

    To stir.

    To check.

    To interfere.

    Resist it.

    The machine knows what it is doing.

    6. Make sure the chicken is done.

    When the rice cooker finishes, check one of the largest pieces of chicken with a food thermometer.

    The chicken needs to reach an internal temperature of 165°F (74°C).

    If it hasn’t reached that temperature, continue cooking until it does.

    7. Finish with the green onions.

    Fluff the chicken and rice together.

    Stir in some of the dark-green onion tops and sprinkle the rest over each serving.

    If you are adding frozen peas and carrots, stir them into the piping-hot chicken and rice, close the lid again, and let everything sit for about five minutes, or until the vegetables are thoroughly heated.

    Taste.

    If it needs a little more soy sauce, add it now.

    Then eat.

    Or, if you are meal prepping like I am, divide everything into three containers.

    Tomorrow’s dinner has already been handled.

    Use What You Already Have

    I think there may be a small lesson hiding somewhere in all of this.

    We accumulate things with good intentions.

    Appliances.

    Books.

    Tools.

    Ideas.

    We tell ourselves we are going to use them.

    Then life happens.

    They sit there.

    And sometimes all it takes is seeing an old thing differently.

    My rice cooker hasn’t changed.

    I stopped seeing it as something that only makes rice and started seeing what else it could do for me.

    It gives me another way to cook without heating up the kitchen.

    It makes meal prep easier.

    It gives me three meals from one pot.

    There is less cleanup.

    Less standing over the stove.

    Less thinking about what I am going to eat tomorrow.

    And most importantly, it still allows me to eat something that feels like dinner.

    Something made at home.

    I think that matters.

    Because convenience has somehow become associated with not caring.

    Fast food.

    Frozen dinners.

    Something eaten standing over the sink because we don’t feel like making anything.

    But convenience doesn’t have to mean neglect.

    Sometimes convenience can be another form of care.

    It can mean making things a little easier for the person you’ll be tomorrow.

    The person who will open the refrigerator, tired and hungry, and discover that someone already thought about dinner.

    Even if that someone was you yesterday.

    Cook’s Note: Rice varieties and rice cookers can behave differently. The rice I used calls for 2 cups of liquid for every 1 cup of uncooked rice. I initially tried less and ended up with rice that was undercooked and burned in places. Check the directions on your rice package and adjust the liquid if necessary.

    Kyle J. Hayes

    kylehayesblog.com

    Please like, comment, and share

    Resources for Hard Times

    If you’re looking for practical help, food support, or community resources, you can visit the Salt, Ink & Soul Resources Page.

    👉 Resources for Hard Times

  • The Work No One Sees

    The Work No One Sees

    The Dishes Almost Kept Me From Learning to Cook.

    I write a lot about learning the metric system.

    It probably seems like an odd thing to get excited about, but switching from cups and teaspoons to weighing ingredients changed the way I cook. Recipes became more consistent. Bread rose the way it was supposed to. Sauces tasted the way I imagined they would. The more I cooked, the more I realized that precision wasn’t taking the joy out of cooking.

    It was giving me confidence.

    I started cooking because I love food.

    Good food.

    Not expensive food.

    Just food made with care.

    For a long time, I thought learning to cook would be the hardest part.

    I was wrong.

    Believe it or not, what almost kept me from cooking wasn’t the recipes.

    It was the dishes.

    The pots and pans.

    The cutting boards.

    The greasy stove.

    The food splattered across the counter.

    The crumbs on the floor.

    All the little reminders that every good meal leaves something behind.

    I can’t tell you how many times I’ve made a meal that turned out exactly the way I hoped. I’d taste as I cooked, adjusting a little salt here, another pinch of pepper there, until everything felt right.

    Then I’d sit down and realize something.

    I wasn’t hungry anymore.

    I’d spent so much time smelling the food and tasting the food that by the time dinner was finished, I was exhausted.

    The kitchen looked like a disaster.

    And now I had another job waiting for me.

    That’s when I realized something.

    Cooking isn’t just about cooking.

    It’s about planning.

    These days I rarely cook for just one meal.

    If I’m already chopping vegetables, washing dishes, heating the oven, and dirtying a sink full of bowls, I might as well make enough for a few days. I try to keep a few meal-prepped meals in the refrigerator or freezer for the evenings when I don’t feel like cooking at all.

    That one change made cooking easier.

    But another lesson changed everything.

    I learned something embarrassingly simple.

    The dishwasher has to be empty before I start cooking.

    Otherwise, everything backs up.

    Dirty dishes stay in the sink because there’s nowhere for them to go.

    Bowls pile up.

    Utensils pile up.

    Before long, one small task I skipped yesterday becomes today’s biggest obstacle.

    It was such a simple lesson.

    But I don’t think it’s only about dishwashers.

    How often do we avoid doing something we love because of one small part we don’t enjoy?

    Maybe it isn’t cooking.

    Maybe it’s writing.

    The writing isn’t the hard part.

    Editing is.

    Maybe it’s exercising.

    The workout isn’t the hard part.

    Putting on your shoes is.

    Sometimes the thing standing between us and the life we want isn’t the dream.

    It’s the cleanup.

    And then there’s another lesson every cook eventually learns.

    The food doesn’t always turn out the way you imagined.

    Sometimes you follow the recipe exactly, and something still feels off.

    Sometimes you try a new ingredient, and it simply doesn’t work.

    Sometimes dinner is just… okay.

    And that’s okay.

    Not every meal has to become your signature dish.

    Not every attempt has to be perfect.

    Every meal teaches you something.

    Every mistake teaches you something.

    The next one is usually a little better.

    I think writing works the same way.

    Most people only see the finished essay.

    They don’t see the sentences that were deleted.

    The paragraphs rewritten five times.

    The moments you stare at the screen wondering why the words won’t come.

    They don’t see the work before the work.

    The same is true of cooking.

    People see the meal.

    They don’t see the planning.

    They don’t see the grocery list.

    They don’t see the dishes.

    They don’t see the quiet work that made any of it possible.

    I’ve come to believe that’s true of almost everything worthwhile.

    The parts people applaud are usually the parts everyone can see.

    The parts that change us are usually the ones no one ever notices.

    Maybe that’s why we should give ourselves a little more grace.

    The work no one sees is still work.

    Sometimes it’s the dishes.

    Sometimes it’s the planning.

    Sometimes it’s simply emptying yesterday’s dishwasher so today’s work has somewhere to begin.

    And more often than not…

    It’s the work that matters most.

    Kyle J. Hayes

    kylehayesblog.com

    Please like, comment, and share

    Resources for Hard Times

    If you’re looking for practical help, food support, or community resources, you can visit the Salt, Ink & Soul Resources Page.
    👉 Resources for Hard Times

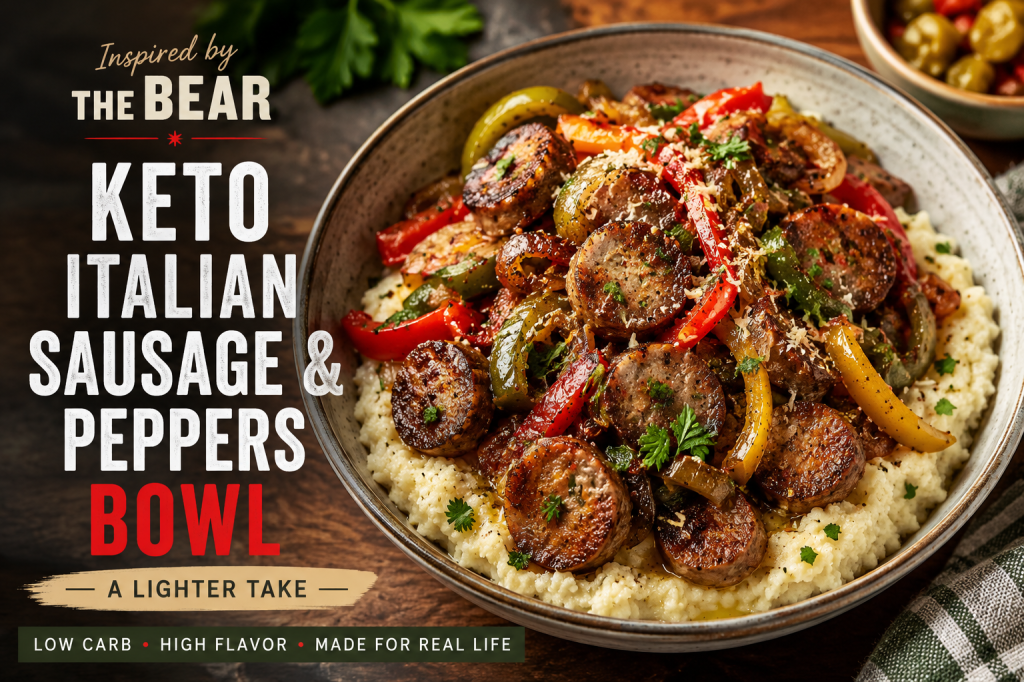
  • Keto Italian Sausage & Peppers

    Keto Italian Sausage & Peppers

    If you’ve watched Season 1 of The Bear, you’ve probably noticed that not every dish gets a close-up. During the rush at The Original Beef of Chicagoland, the kitchen fills with a constant rhythm of shouted orders. Alongside the famous Italian beef, one order comes up again and again:

    “Sausage-pepper!”

    The show never stops to explain how it’s made. It doesn’t need to. In a neighborhood Chicago sandwich shop, Italian sausage and peppers are simply part of the rhythm of the day. It’s dependable, the kind of meal regular customers order without even looking at the menu.

    This recipe imagines that classic in a way that fits today’s kitchen. Instead of serving it on a crusty Italian roll, we’re building a hearty bowl with creamy cauliflower mash, sweet roasted peppers, and juicy Italian sausage. It’s lower in carbohydrates, perfect for meal prep, and easy enough for anyone to make—even if you’re just beginning to feel comfortable in the kitchen.

    Because good food doesn’t have to be complicated.

    It just has to make people feel like someone cared enough to cook.

    Servings

    4–6

    Prep Time: 15 minutes

    Cook Time: 40 minutes

    Ingredients

    For the Sausage

    • 2 pounds Italian chicken sausage or lean Italian pork sausage (mild or hot)
    • 1 tablespoon olive oil

    For the Peppers

    • 2 red bell peppers
    • 2 green bell peppers
    • 1 yellow bell pepper
    • 1 large yellow onion
    • 4 garlic cloves
    • 1 tablespoon olive oil

    Seasonings

    • 1 teaspoon dried oregano
    • 1 teaspoon dried basil
    • 1 teaspoon garlic powder
    • ½ teaspoon smoked paprika
    • ½ teaspoon crushed fennel seed (optional, but recommended)
    • ½ teaspoon kosher salt
    • ½ teaspoon black pepper
    • Pinch of crushed red pepper flakes (optional)

    For the Cauliflower Mash

    • 1 large head cauliflower (or two bags of frozen cauliflower florets)
    • 2 tablespoons butter
    • ¼ cup grated Parmesan cheese
    • 2 tablespoons heavy cream
    • Salt and pepper to taste

    Optional Toppings

    • Fresh parsley
    • Fresh grated Parmesan
    • Giardiniera
    • Pepperoncini

    Instructions

    Step 1: Slice the Vegetables

    Wash the peppers.

    Cut them in half and remove the seeds.

    Slice the peppers into strips about the width of your finger.

    Slice the onion into thin strips.

    Peel and finely chop the garlic.

    Don’t worry if everything isn’t exactly the same size. Home cooking isn’t about perfection.

    Step 2: Brown the Sausage

    Heat a large skillet or frying pan over medium heat.

    Add the olive oil.

    Place the sausages into the pan.

    Cook them for about 8 to 10 minutes, turning every couple of minutes until browned on all sides.

    They don’t need to be fully cooked yet.

    Move them to a plate.

    Step 3: Cook the Peppers

    Using the same pan, add the peppers and onions.

    Cook them for about 10 to 12 minutes, stirring occasionally.

    They should become soft and slightly golden around the edges.

    Add the chopped garlic.

    Cook for one more minute.

    Sprinkle in:

    • oregano
    • basil
    • garlic powder
    • smoked paprika
    • fennel seed
    • salt
    • pepper
    • red pepper flakes (if using)

    Stir everything together.

    Step 4: Finish the Sausage

    Slice the browned sausage into bite-sized pieces.

    Return it to the pan with the peppers.

    Cover with a lid.

    Cook another 8 to 10 minutes, stirring once or twice, until the sausage is fully cooked.

    If the pan starts looking dry, add a few tablespoons of water or chicken broth.

    The vegetables will absorb all those wonderful flavors.

    Step 5: Make the Cauliflower Mash

    While the sausage cooks, boil or steam the cauliflower until it’s very soft.

    Drain it well.

    Place it into a food processor or blender with:

    • butter
    • Parmesan
    • heavy cream
    • a pinch of salt
    • a little black pepper

    Blend until smooth.

    If you don’t have a blender, use a potato masher. The texture will be more rustic, but just as delicious.

    Build Your Bowl

    Start with a generous scoop of cauliflower mash.

    Top with:

    • Italian sausage
    • Sweet peppers
    • Onions

    Finish with:

    • Fresh parsley
    • Parmesan
    • A spoonful of giardiniera if you like a little heat.

    Serve while everything is hot.

    Meal Prep

    This recipe was made for busy weeks.

    Divide into containers with:

    • Cauliflower mash on one side
    • Sausage and peppers on the other

    Refrigerate for up to 4 days.

    The flavors become even better overnight, making leftovers something to look forward to.

    Estimated Nutrition

    (Per serving, based on 6 servings using chicken Italian sausage)

    • Calories: Approximately 430
    • Protein: 32 grams
    • Fat: 29 grams
    • Net Carbohydrates: 9–11 grams

    Salt, Ink & Soul

    There is a quiet dignity in everyday food.

    Not every meal is meant to impress strangers on the internet. Most are meant for something much smaller, and somehow much more important. A family sitting around the table after a long day. A meal packed for tomorrow’s lunch. A friend who drops by without warning. A cook making enough so no one leaves hungry.

    Those are the meals that shape our memories.

    Kyle J. Hayes

    kylehayesblog.com

    Please like, comment, and share

    Resources for Hard Times

    If you’re looking for practical help, food support, or community resources, you can visit the Salt, Ink & Soul Resources Page.

    👉 Resources for Hard Times

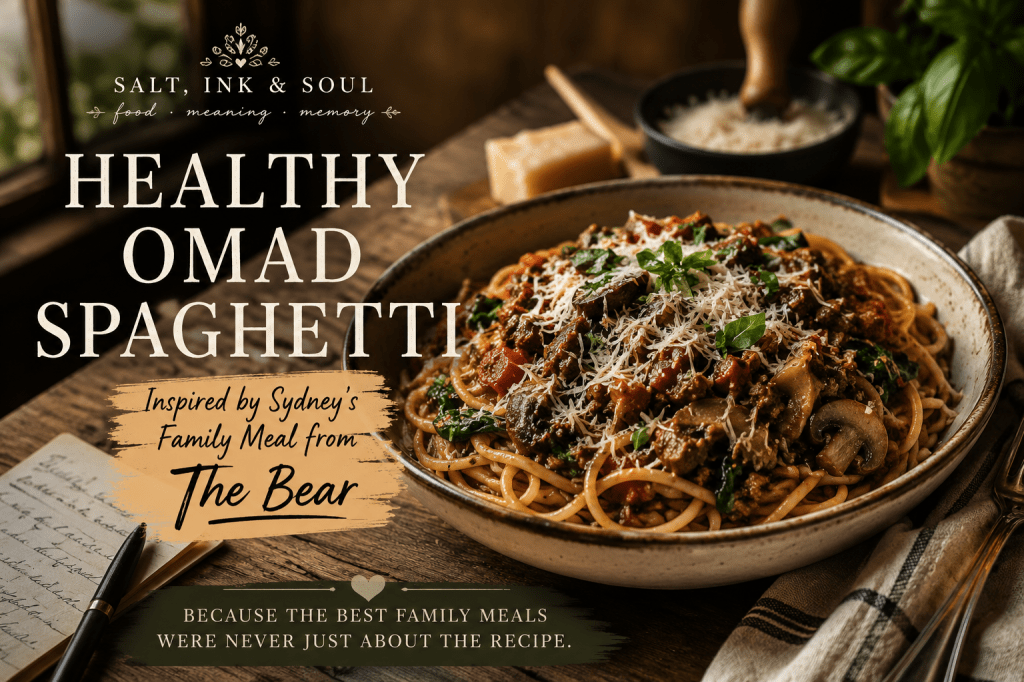
  • Salt, Ink & Soul Healthy Spaghetti

    Salt, Ink & Soul Healthy Spaghetti

    Inspired by Sydney’s Family Meal from “The Bear”

    I’ve been trying to watch as much of The Bear as I can. It’s not always easy. The show has a way of turning up the heat—not just in the kitchen, but in the people. There are moments when the intensity becomes a little too much for me, so I pause it, step away, and come back another day. But every time I do, I find myself thinking about the food. It isn’t just something to eat; it’s another way the characters care for one another, even when they don’t know how to say the words.

    One of my favorite parts of the show is the family meal. It reminded me that the meals we remember most are rarely about the recipe itself. Years later, we don’t always remember exactly what was seasoned with this or cooked for that long. We remember who was sitting around the table. The conversations that stretched a little longer than the meal. The laughter. The stories. The comfort of knowing that, for a little while, everyone belonged in the same place.

    That inspired me to try making some of the dishes from the show in my own kitchen. Not exact copies, and probably not all of them. Just the ones that feel within reach, with a few small changes to better fit the way I’m eating these days. My goal isn’t to recreate the restaurant. It’s to bring a little of that feeling home.

    So here’s my healthier take on Sydney’s family meal spaghetti—a version made for One Meal A Day (OMAD), with plenty of lean protein, vegetables, and just enough real pasta to remind me that eating well doesn’t have to mean giving up the foods that bring us comfort.

    Salt, Ink & Soul Healthy Spaghetti

    Servings

    4 meal-prep portions

    Ingredients

    Protein

    • 2 pounds (907 g) 93% lean ground beef
    • (Optional) Replace ½ pound with lean Italian turkey sausage for a little extra flavor.

    Pasta

    • 8 ounces (227 g) high-quality dried spaghetti
      • This works out to 2 ounces (56 g) dry pasta per serving.

    Sauce

    • 1 (24-ounce) jar no-sugar-added marinara sauce
    • 1 (15-ounce) can crushed tomatoes
    • 2 tablespoons tomato paste

    Vegetables

    • 8 ounces mushrooms, sliced
    • 1 medium onion, diced
    • 1 medium zucchini, diced small
    • 1 bell pepper, diced
    • 3 cups fresh spinach
    • 4 cloves garlic, minced

    Seasonings

    • 2 tablespoons olive oil
    • 2 teaspoons Italian seasoning
    • 1 teaspoon dried oregano
    • 1 teaspoon dried basil
    • 1 teaspoon garlic powder
    • 1 teaspoon onion powder
    • ½ teaspoon crushed red pepper flakes (optional)
    • 1 teaspoon kosher salt, or to taste
    • ½ teaspoon freshly ground black pepper

    To Finish

    • Fresh basil, chopped (optional)
    • Freshly grated Parmesan cheese

    Instructions

    1. Build the Flavor

    Heat the olive oil in a large Dutch oven or heavy-bottomed pot over medium-high heat.

    Add the onions and mushrooms and cook for 5–6 minutes until they begin to soften and develop color.

    Stir in the garlic and cook for another 30 seconds.

    Add the ground beef and cook until browned, breaking it into small pieces as it cooks. If necessary, drain any excess fat.

    2. Add the Vegetables

    Stir in the zucchini and bell pepper.

    Cook for about 5 minutes until they begin to soften.

    Fold in the spinach and cook just until wilted.

    3. Simmer the Sauce

    Add:

    • Marinara sauce
    • Crushed tomatoes
    • Tomato paste
    • Italian seasoning
    • Oregano
    • Basil
    • Garlic powder
    • Onion powder
    • Salt
    • Pepper
    • Red pepper flakes (if using)

    Stir well.

    Reduce the heat to low and let the sauce simmer for 30–40 minutes, stirring occasionally.

    The longer it simmers, the deeper and richer the flavors become.

    4. Cook the Pasta

    While the sauce simmers, cook the spaghetti according to the package directions until al dente.

    Before draining, reserve about ½ cup of the pasta water.

    If the sauce needs thinning, stir in a splash of the reserved pasta water.

    5. Assemble

    Place approximately 2 ounces (56 g dry, cooked) spaghetti into each bowl or meal-prep container.

    Top generously with the meat-and-vegetable sauce.

    Finish with freshly grated Parmesan and chopped basil.

    Garlic Green Beans

    Ingredients

    • 1 pound fresh green beans
    • 1 tablespoon olive oil
    • 2 cloves garlic, minced
    • Salt and pepper
    • Juice of ½ lemon

    Instructions

    Bring a pot of salted water to a boil.

    Cook the green beans for 4–5 minutes until tender-crisp.

    Drain well.

    Heat the olive oil in a skillet over medium heat.

    Add the garlic and cook for about 30 seconds until fragrant.

    Add the green beans and toss for 2–3 minutes.

    Season with salt, pepper, and a squeeze of fresh lemon juice.

    Meal Prep

    Divide everything into four containers:

    • 2 ounces dry (56 g) cooked spaghetti
    • Generous serving of meat and vegetable sauce
    • Garlic green beans

    Each meal is packed with lean protein, colorful vegetables, and just enough pasta to satisfy the craving without overwhelming the plate.

    Salt, Ink & Soul

    One thing I’ve learned is that eating healthier doesn’t have to mean giving up the meals you love. Sometimes it simply means making room for better ingredients, a little more balance, and a little more intention.

    Like the family meals that inspired this recipe, this isn’t about perfection.

    It’s about taking the time to feed yourself well.

    Because the people gathered around the table always mattered more than the recipe.

    Kyle J. Hayes

    kylehayesblog.com

    Please like, comment, and share

    Resources for Hard Times

    If you’re looking for practical help, food support, or community resources, you can visit the Salt, Ink & Soul Resources Page.

    👉 Resources for Hard Times

  • Simple Grilled Chicken for Keto-Style Giardiniera

    Simple Grilled Chicken for Keto-Style Giardiniera

    Servings: 4

    Prep Time: 10 minutes

    Cook Time: 12–15 minutes

    This Simple Grilled Chicken is quietly earning a regular place in my week. It’s seasoned with just a handful of pantry staples, grilled until juicy, and versatile enough to become lunch, dinner, or tomorrow’s meal prep. On its own, it’s delicious. But paired with my Keto-Style Giardiniera, it becomes something special. The bright, tangy vegetables and herb-infused marinade transform a simple piece of chicken into a meal that never feels ordinary.

    I’ve learned that healthy eating isn’t about chasing complicated recipes. It’s about finding a few dependable ones that make you excited to open the refrigerator rather than reach for the drive-thru.

    This is one of those recipes.

    Ingredients

    • 900 g boneless, skinless chicken breasts (about 4 medium breasts)
    • 30 ml extra-virgin olive oil
    • 5 g kosher salt
    • 2 g freshly ground black pepper
    • 5 g garlic powder
    • 5 g Italian seasoning
    • 2 g paprika (optional, for color)

    To Serve

    • Keto-Style Giardiniera
    • 15 ml Keto-Style Giardiniera marinade per serving

    Instructions

    1. If needed, pound the chicken breasts to an even thickness of approximately 2 cm to ensure even cooking.
    2. Pat the chicken dry with paper towels.
    3. In a small bowl, combine the kosher salt, black pepper, garlic powder, Italian seasoning, and paprika.
    4. Brush the chicken evenly with the olive oil, then coat both sides with the seasoning mixture.
    5. Preheat a grill or grill pan over medium-high heat.
    6. Grill the chicken for 6–7 minutes per side, or until the internal temperature reaches 74°C (165°F).
    7. Transfer the chicken to a plate and allow it to rest for 5 minutes before slicing.

    To Serve

    Arrange the sliced chicken on a plate.

    Top with a generous spoonful of Keto-Style Giardiniera, then drizzle approximately 15 ml of the herb-infused giardiniera marinade over the chicken just before serving.

    Serve with Roasted Broccoli with Giardiniera Herb Dressing or your favorite low-carb vegetable for a complete meal.

    Meal Prep Tip

    Grill all four chicken breasts at the beginning of the week and refrigerate them in airtight containers. When you’re ready to eat, simply reheat a chicken breast, top it with Keto-Style Giardiniera, and finish with a drizzle of the marinade.

    Simple meals don’t have to be boring. Sometimes all it takes is one well-seasoned piece of chicken and a jar of something made with care.

    Enjoy.

    Kyle J. Hayes

    kylehayesblog.com

    Please like, comment, and share

    Resources for Hard Times

    If you’re looking for practical help, food support, or community resources, you can visit the Salt, Ink & Soul Resources Page.
    👉 Resources for Hard Times

  • Keto-Style Giardiniera

    Keto-Style Giardiniera

    Sometimes the difference between giving up and staying the course is a jar in the refrigerator.

    Eating healthier has always sounded easier than it actually is.

    Most of us don’t wake up craving another bland chicken breast. We don’t fail because we don’t know what healthy food looks like. We fail because, after a long day, we’re tired and hungry, and the drive-thru asks less of us than our own kitchen.

    I’ve learned that if I can make healthy food taste like something I actually look forward to eating, I stand a much better chance of staying on the path.

    That’s where this Keto-Style Giardiniera comes in.

    It started as a simple idea. I wanted something bright, crisp, spicy, and full of flavor to spoon over grilled chicken throughout the week. Something that could turn meal prep into something I would actually be excited to eat.

    The result was better than I expected.

    The vegetables stay crisp. The garlic mellows. The olive oil carries the herbs while the vinegar adds just enough brightness to wake everything up. Every day the flavors become a little deeper.

    One thing I discovered is that the amount of marinade below is intentionally generous. It makes more than you’ll probably need for a single batch of vegetables, but that’s by design. I like knowing every piece stays completely submerged while it develops its flavor.

    And when the vegetables are gone, don’t pour the marinade down the sink.

    It’s become one of my favorite parts.

    Use it to marinate chicken, drizzle it over roasted vegetables, or toss it with a salad. Good food shouldn’t be wasted.

    This recipe has become a regular part of my weekly meal prep, usually served over grilled chicken with a side of roasted vegetables. It’s simple and satisfying, and it reminds me that eating well doesn’t have to mean eating without joy.

    Keto-Style Giardiniera

    Yield: Approximately 1 liter

    Vegetables

    • 300 g cauliflower florets
    • 100 g celery, thinly sliced (about 2 medium stalks)
    • 150 g green bell pepper, diced
    • 75 g red bell pepper, diced
    • 50–75 g jalapeños, thinly sliced (2–3 peppers)
    • 20 g garlic, thinly sliced (about 4 cloves)
    • 30 g carrot, very thinly sliced (optional for the lowest-carb version)

    Marinade

    • 480 ml extra-virgin olive oil
    • 240 ml distilled white vinegar
    • 10 g kosher salt
    • 5 g Italian seasoning
    • 5 g crushed red pepper flakes (adjust to your preferred heat)
    • 1 g ground mustard powder
    • 2 g freshly ground black pepper
    • 2 g fennel seeds, lightly crushed
    • 2 g garlic powder (optional, but recommended)

    Instructions

    1. Wash and thoroughly dry all of the vegetables.
    2. Cut the cauliflower into bite-sized florets about 2–3 cm across.
    3. Thinly slice the celery, jalapeños, garlic, and carrot (if using). Dice the bell peppers into small, even pieces.
    4. Pack the vegetables tightly into a clean 1-liter wide-mouth glass jar.
    5. In a measuring jug, whisk together all of the marinade ingredients until well combined.
    6. Pour the marinade over the vegetables until they are completely submerged. The recipe makes extra marinade intentionally to ensure full coverage. Any leftover marinade can be refrigerated for future use.
    7. Seal the jar tightly and refrigerate.
    8. Once each day, gently turn or shake the jar to redistribute the herbs and spices.

    When It’s Ready

    • 24 hours: Fresh and flavorful
    • 48 hours: Even better
    • 5–7 days: My favorite. The flavors have fully come together while the vegetables remain wonderfully crisp.

    My Favorite Way to Serve It

    I usually grill several chicken breasts at the beginning of the week with nothing more than salt, black pepper, garlic powder, and Italian seasoning.

    When it’s time to eat, I slice one chicken breast and spoon a generous helping of Keto-Style Giardiniera over the top.

    That’s it.

    Sometimes I’ll add roasted broccoli or a simple salad, but honestly, the giardiniera does most of the work. It transforms plain chicken into something I actually look forward to eating.

    It’s one of those small changes that makes healthy eating feel less like discipline and more like taking care of yourself.

    And I’ve learned that’s often enough to keep going.

    Kyle J. Hayes

    kylehayesblog.com

    Please like, comment, and share

    Resources for Hard Times

    If you’re looking for practical help, food support, or community resources, you can visit the Salt, Ink & Soul Resources Page.
    👉 Resources for Hard Times

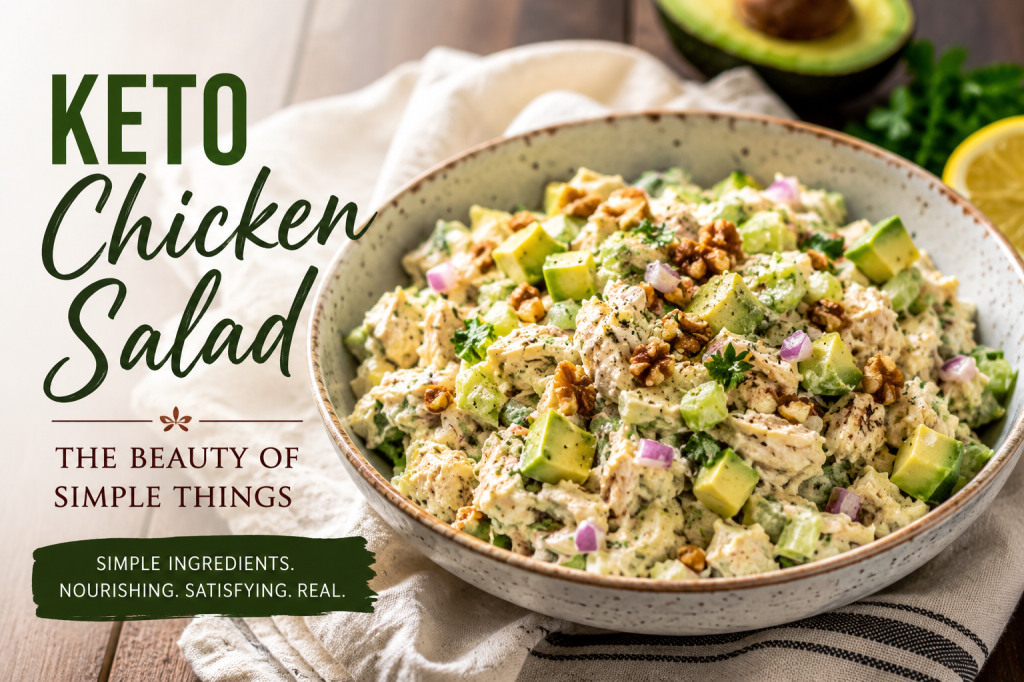
  • Keto Chicken Salad: The Beauty of Simple Things

    Keto Chicken Salad: The Beauty of Simple Things

    Some meals are celebrations.

    Others are comfort.

    And then there are meals like this one.

    The kind you make on a quiet afternoon when you do not feel like turning on the stove again. The kind that sits patiently in the refrigerator, waiting for you after a long walk, a busy day, or a moment when you simply need something nourishing without a lot of fuss.

    Chicken salad has always been one of those foods that reminds me that simple does not mean boring.

    A handful of ingredients. A little care. A little patience.

    That is often enough.

    This version keeps things low in carbohydrates while still delivering plenty of flavor and texture. Tender chicken, crisp celery, creamy avocado, a little bite from red onion, and a dressing that ties everything together without overwhelming the ingredients.

    It is the sort of meal that feels light but satisfying.

    The sort of meal that quietly takes care of you.

    Ingredients

    • 500 g cooked chicken breast, shredded
    • 100 g celery, finely diced
    • 50 g red onion, finely chopped
    • 20 g fresh parsley, chopped
    • 1 medium avocado, diced
    • 100 g mayonnaise
    • 15 ml Dijon mustard
    • 15 ml fresh lemon juice
    • Salt and freshly ground black pepper, to taste
    • Pinch of paprika (optional)
    • 30 g chopped walnuts or almonds (optional)

    Directions

    1. Prepare the Ingredients

    Place the shredded chicken into a large mixing bowl.

    Add the celery, red onion, and parsley. Dice the avocado and set it aside until the end, so it keeps its shape.

    2. Make the Dressing

    In a smaller bowl, whisk together the mayonnaise, Dijon mustard, and lemon juice.

    Season with salt, pepper, and a pinch of paprika if you enjoy a little smoky flavor.

    Taste and adjust as needed.

    3. Bring Everything Together

    Pour the dressing over the chicken mixture and stir gently until everything is evenly coated.

    Fold in the avocado carefully. You want pieces of avocado throughout the salad, not mashed into the dressing.

    4. Add a Little Crunch

    If using walnuts or almonds, fold them in now or sprinkle them over the top just before serving.

    The extra texture is worth it.

    5. Let It Rest

    Cover and refrigerate for at least 30 minutes.

    Like many simple dishes, this one improves when given a little time. The flavors settle in and get to know one another.

    Serving Suggestions

    Serve over a bed of mixed greens.

    Spoon it into crisp lettuce leaves.

    Or enjoy it straight from the bowl while standing in the kitchen, wondering why some of the simplest meals are often the most satisfying.

    No judgment here.

    From the Kitchen

    There is something comforting about a recipe that does not ask much from you.

    No complicated techniques.

    No special equipment.

    Just a few good ingredients coming together to make something better than they could have been alone.

    Sometimes that is enough for dinner.

    Sometimes that is enough for life.

    Kyle J. Hayes

    kylehayesblog.com

    Please like, comment, and share

    Resources for Hard Times

    If you’re looking for practical help, food support, or community resources, you can visit the Salt, Ink & Soul Resources Page.

    👉 Resources for Hard Times

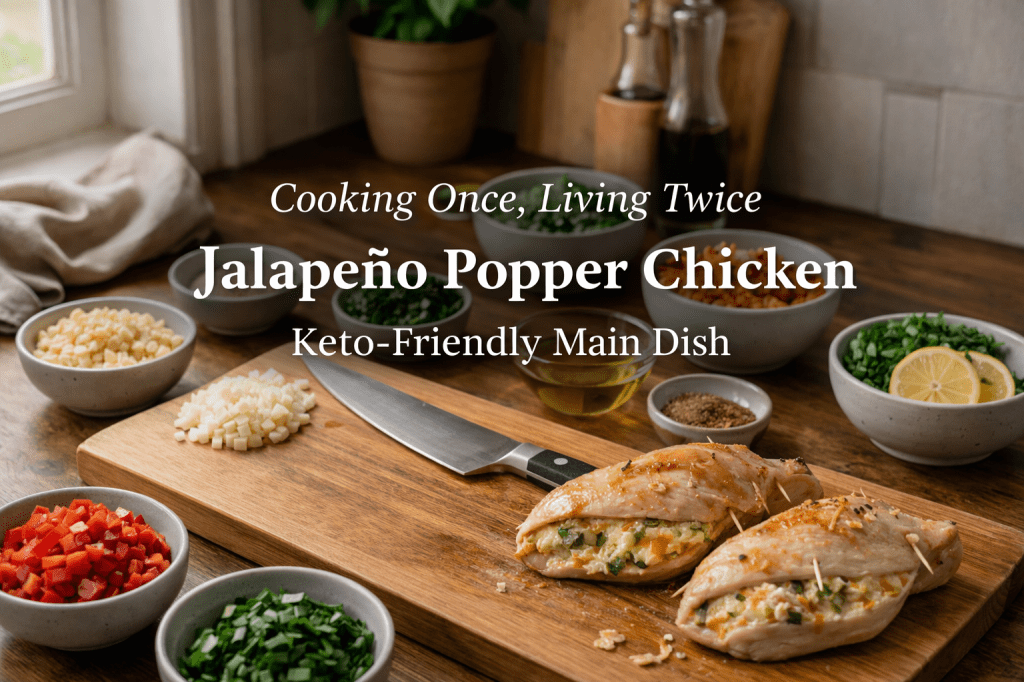
  • Cooking Once, Living Twice

    Cooking Once, Living Twice

    Jalapeño Popper Chicken (Keto-Friendly Main Dish)

    There’s a certain kind of heat that doesn’t come from the stove.

    It comes from the day itself.

    From the bill you just paid.

    From the receipt, you didn’t want to look at too closely.

    From the quiet math you do in your head while standing in the grocery aisle, deciding what stays and what goes.

    And in the middle of all that, the kitchen still calls.

    Not for perfection.

    Not for performance.

    Just for something steady.

    I’ve learned this slowly—meals don’t always need to be made fresh every night to be meaningful. Sometimes the most honest kind of cooking is the kind that understands tomorrow before it gets here. The kind that asks: How do I take care of myself now… so I don’t have to struggle later?

    That’s where this dish lives.

    Not in nostalgia.

    Not in tradition alone.

    But in adaptation.

    Because this isn’t the casserole people expect.

    This is something sharper.

    Warmer.

    A little louder in flavor, but still grounded in the same idea that built kitchens long before ours—cook once, stretch it, make it last.

    And more importantly… make it good.

    Ingredients

    • 4 boneless, skinless chicken breasts
    • 8 oz cream cheese, softened
    • 1 cup shredded cheddar cheese
    • 1/2 cup diced jalapeños (adjust to your comfort)
    • 1/2 teaspoon garlic powder
    • 1/2 teaspoon onion powder
    • Salt and pepper, to taste
    • 1 cup crushed pork rinds (or almond flour for a softer coating)
    • Olive oil or cooking spray

    Instructions

    1. Preheat your oven to 375°F (190°C).
    2. Give the space time to warm up. Rushing the beginning rarely helps the end.
    3. Prepare the filling.
    4. In a bowl, combine cream cheese, cheddar, jalapeños, garlic powder, onion powder, salt, and pepper.
    5. Mix until it becomes one thing. Smooth. Intentional.
    6. Create space in the chicken.
    7. Lay each breast flat and slice a pocket into the side.
    8. Not too deep. Just enough.
    9. Sometimes that’s all that anything needs.
    10. Stuff the chicken.
    11. Divide the mixture evenly and fill each piece.
    12. Secure with toothpicks if needed. Nothing fancy. Just hold it together.
    13. Prepare the coating.
    14. Crush the pork rinds into fine crumbs—or use almond flour.
    15. Spread them on a plate, then press each chicken breast into the coating until it’s fully coated.
    16. Set the pan.
    17. Place the chicken on a parchment-lined baking sheet. Lightly coat with oil or spray.
    18. Give everything its place before the heat begins.
    19. Bake for 25–30 minutes, until the chicken is cooked through and the outside turns golden and crisp.
    20. This is the part where the house changes. Where effort becomes something you can smell.
    21. Rest before serving.
    22. Let it sit for a few minutes.
    23. Not everything needs to be rushed to the plate.

    Notes from the Kitchen

    • This dish holds well. That matters.
    • It reheats without losing itself, which makes it more than dinner—it becomes tomorrow, already handled.
    • Adjust the jalapeños to your tolerance.
    • Heat should support the dish, not overwhelm it.
    • If you’re planning ahead—and I suggest you do—prep everything the night before.
    • When the time comes, all you’ll need to do is move.
    • Pair it with something simple.
    • A side salad. Steamed vegetables. Nothing that competes. Just something that completes.

    A Quiet Understanding

    There’s a kind of respect that doesn’t get talked about enough.

    Respect for your time.

    For your energy.

    For the version of you that will walk into the kitchen tomorrow already tired.

    This kind of cooking honors that person.

    It says: I thought about you already.

    I made sure you’d have something waiting.

    And maybe that’s what this really is.

    Not just a recipe.

    Not just another meal.

    But a small refusal to live in constant reaction.

    A decision to step ahead of the moment instead of being caught inside it.

    Cooking once.

    Living twice.

    And in times like these…

    That’s not just practical.

    That’s necessary.

    Kyle J. Hayes

    kylehayesblog.com

    If this found you at the right time,

    Feel free to like, comment, or share it with someone who might need it too.

    Resources for Hard Times

    If you’re looking for practical help, food support, or community resources, you can visit the Salt, Ink & Soul Resources Page.

    👉 Resources for Hard Times