The Wisdom of Leaving Things Alone
There is a temptation in cooking to keep adding.
Another spice.
Another sauce.
Another ingredient that promises to improve something.
Sometimes that instinct serves us well.
Sometimes it ruins everything.
The older I get, the more I appreciate restraint.
A perfectly ripe avocado doesn’t need a committee meeting. A crisp cucumber doesn’t need to be disguised beneath layers of dressing and distraction. Good ingredients often arrive carrying everything they need.
The real skill is knowing when to stop.
That lesson extends far beyond the kitchen.
We spend our lives trying to improve ourselves, improve our circumstances, improve our plans. Yet some of the best moments we experience come when we stop forcing things and simply appreciate what is already in front of us.
This salad is built on that idea.
Simple ingredients.
Clean flavors.
Nothing is hiding behind anything else.
Just freshness, balance, and the quiet confidence that comes from knowing enough is enough.
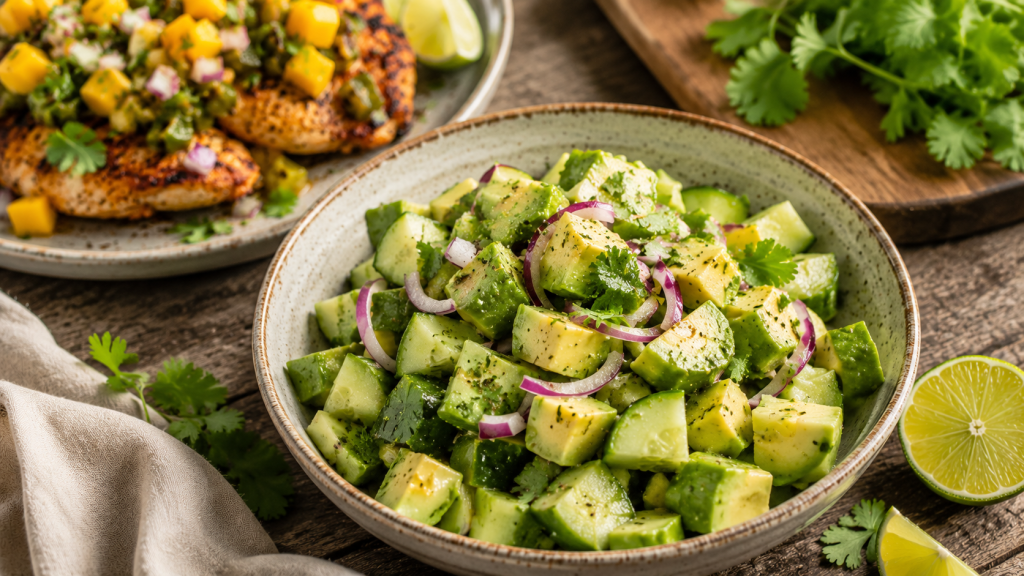
Avocado and Cucumber Salad
Serves 4
Ingredients
- 2 ripe avocados, diced
- 1 large cucumber, diced
- ¼ cup red onion, thinly sliced
- Juice of 1 lime
- 1 tablespoon olive oil
- Salt to taste
- Freshly ground black pepper to taste
- 1 tablespoon fresh cilantro, chopped
Instructions
Step 1: Prepare the Vegetables
Dice the avocados into bite-sized pieces.
Cut the cucumber into similar-sized pieces.
Thinly slice the red onion.
Place everything in a large bowl.
Try not to overthink it.
Uniformity is overrated.
Step 2: Dress the Salad
Add the lime juice, olive oil, cilantro, salt, and black pepper.
Gently toss everything together.
The goal is not to mash the avocado into submission.
Treat it with a little respect.
Step 3: Taste and Adjust
Taste.
Add another squeeze of lime if it needs brightness.
A little more salt if it feels sleepy.
Trust your instincts.
Recipes are suggestions.
Your tongue is the final authority.
Step 4: Serve
Serve immediately while everything is fresh and vibrant.
This is not a dish that benefits from waiting around.
Neither do many of life’s best moments.
What to Serve Alongside
This salad pairs beautifully with:
- Green Chile Mango Salsa Chicken
- Grilled fish
- Black beans seasoned with garlic and cumin
- Grilled zucchini and summer squash
- A simple piece of crusty bread
Nothing complicated.
The salad already knows what it is.
Closing Thought
There is a strange kind of freedom that comes from realizing not everything needs improvement.
Some things only need appreciation.
A ripe avocado.
A cool cucumber.
A meal shared with someone you care about.
An ordinary afternoon that turns out to be memorable for reasons you never saw coming.
The world encourages us to chase more.
The kitchen occasionally reminds us to recognize enough.
And enough, when we’re paying attention, can be a beautiful thing.
Please like, comment, and share
Resources for Hard Times
If you’re looking for practical help, food support, or community resources, you can visit the Salt, Ink & Soul Resources Page.