Some recipes feel less like cooking and more like paying attention.
A mango is already almost enough by itself. Sweet. Soft. Bright. A little wild when it is ripe enough. The kind of fruit that asks very little from you, except maybe a knife and a moment of quiet.
But heat changes it.
A few minutes on the grill brings the sugar forward. The edges darken. The fruit softens. The sweetness deepens into something warmer, almost smoky. Then comes the chile, the lime, the salt. Suddenly, it is no longer just fruit. It is a small plate of summer. Sweetness with a little fire behind it. Brightness with a little edge.
This is simple food.
Not dessert exactly. Not a side dish exactly. Something in between. Something you can serve beside grilled chicken, tacos, a sandwich, or eat standing in the kitchen before anyone else notices.
And sometimes that is the best kind of recipe.
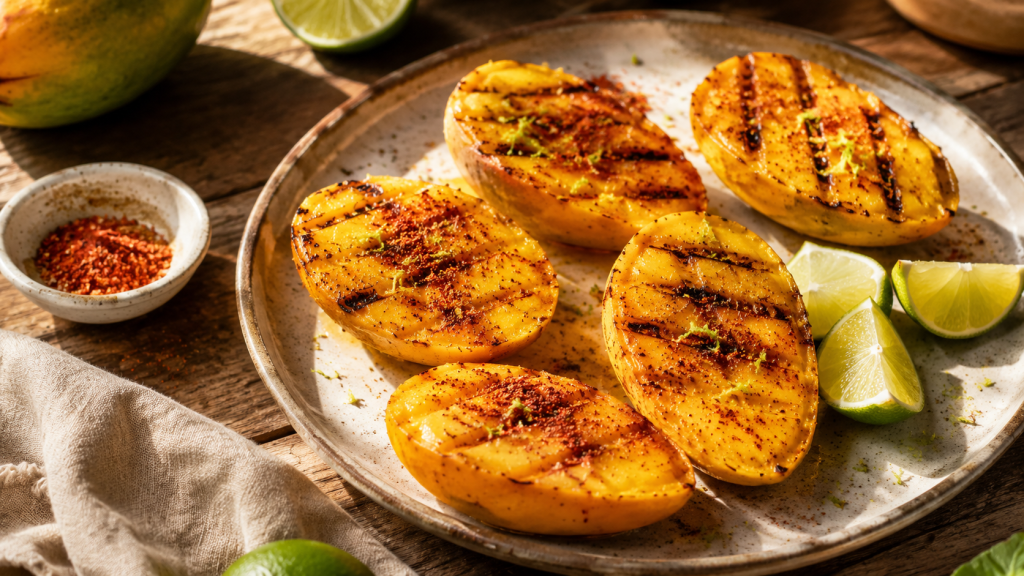
Grilled Mangoes with Chile and Lime
Ingredients
- 2 ripe but firm mangoes
- 1 tablespoon neutral oil or melted butter
- 1 tablespoon fresh lime juice
- 1 teaspoon honey, optional
- 1/2 teaspoon chili powder
- 1/4 teaspoon New Mexico red chile powder, optional
- Pinch of cayenne, optional
- 1/4 teaspoon salt
- Zest of 1 lime, optional
- Fresh cilantro or mint, optional
- Extra lime wedges, for serving
Instructions
Heat a grill, grill pan, or cast-iron skillet over medium-high heat.
Cut the mangoes along both sides of the pit, leaving you with two wide mango cheeks from each fruit. You can score the flesh lightly in a crosshatch pattern, but do not cut through the skin. This helps the seasoning settle in and makes the mango easier to eat later.
In a small bowl, stir together the oil or melted butter, lime juice, honey (if using), chili powder, New Mexico red chile powder, cayenne (if using), and salt.
Brush the cut side of each mango with the chile-lime mixture.
Place the mangoes cut-side down on the hot grill. Cook for 2 to 4 minutes, until grill marks appear and the fruit begins to soften.
Turn them over and cook for another 1 to 2 minutes on the skin side, just to warm them through.
Remove from the grill.
Finish with lime zest, a little more chile powder, fresh cilantro or mint if desired, and a squeeze of fresh lime.
Serve warm.
Notes From My Kitchen
Use ripe but still firm mangoes. If they are too soft, they may fall apart on the grill.
A grill pan works well if you do not want to cook outside. A cast-iron skillet will not give you the same marks, but it will still caramelize the fruit.
For a New Mexico version, use a little New Mexico red chile powder in the seasoning. It brings warmth without taking away from the mango.
For something closer to street fruit, finish with tajín or a chile-lime seasoning.
For a richer version, brush the mangoes with melted butter instead of oil.
For a dessert version, add a spoonful of Greek yogurt, whipped cream, or vanilla ice cream beside the warm mango.
What to Serve With It
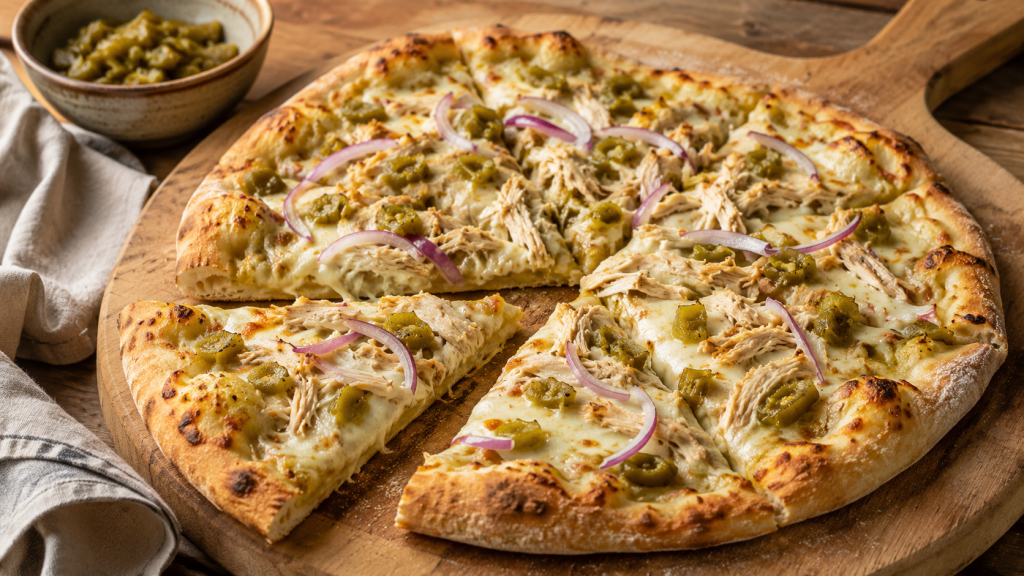
These grilled mangoes would sit beautifully beside Green Chile Chicken Pizza, especially if you want something bright and sweet after all that cheese, chile, and crust.
They would also work with grilled chicken, fish tacos, carne asada, or a simple bowl of rice and beans.
Final Note
This is the kind of food that reminds you how little a good ingredient needs.
A little heat.
A little salt.
A little lime.
Enough chile to wake it up.
And suddenly, the mango becomes more than just sweet. It becomes summer with a spark.
Please like, comment, and share
Resources for Hard Times
If you’re looking for practical help, food support, or community resources, you can visit the Salt, Ink & Soul Resources Page.