Every summer, when the garden feels generous.
The tomatoes finally ripen.
The cucumbers seem to multiply overnight.
Fresh herbs spill over the edges of their containers as if they have forgotten where they were supposed to stop growing.
And the corn arrives.
Sweet and bright, tasting like sunshine somehow found its way into a vegetable.
This salad reminds me that some of the best summer meals do not require an oven, a grill, or much planning at all.
Just a bowl.
A knife.
And ingredients that already know how to be delicious.
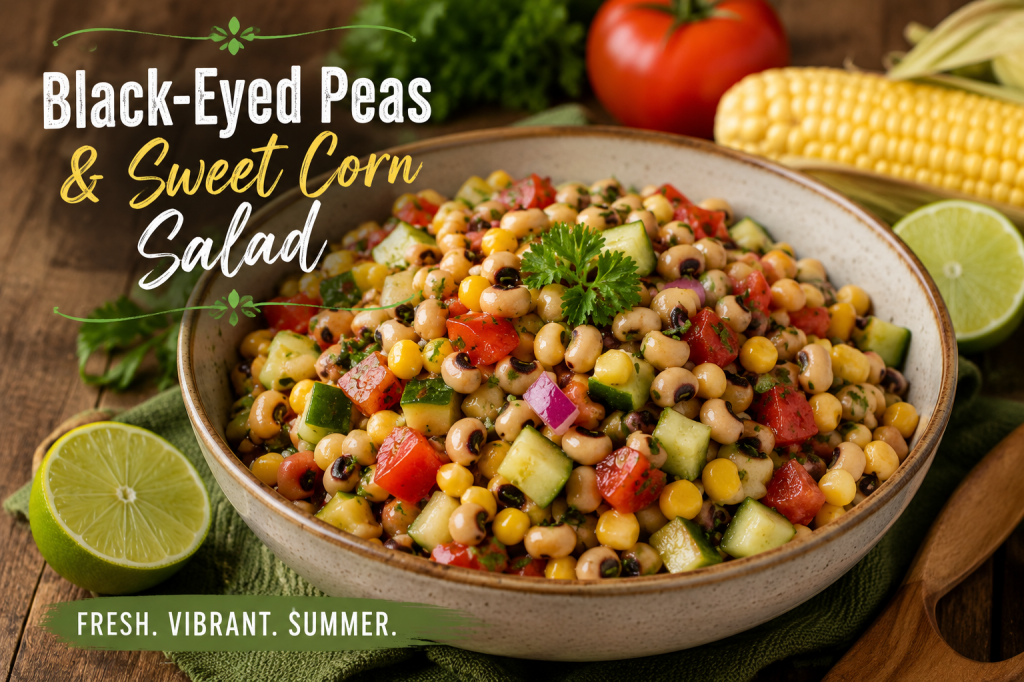
The black-eyed peas bring substance and tradition.
The sweet corn brings brightness.
The vegetables bring freshness.
Together they create something that feels at home beside barbecue, fried chicken, or a plate of macaroni and cheese.
A reminder that summer cooking is often at its best when we simply let the ingredients speak for themselves.
Serves
6 to 8
Ingredients
For the Salad
- 2 cups cooked black-eyed peas, drained and cooled
- 2 cups sweet corn kernels (fresh, grilled, or thawed frozen corn)
- 2 medium tomatoes, diced
- 1 cucumber, diced
- ½ red bell pepper, diced
- ¼ red onion, finely diced
- ¼ cup fresh parsley, chopped
- 2 tablespoons fresh basil, chopped
For the Dressing
- 3 tablespoons olive oil
- 2 tablespoons apple cider vinegar
- Juice of 1 lime
- 1 teaspoon honey
- ½ teaspoon kosher salt
- ½ teaspoon black pepper
Directions
1. Prepare the Vegetables
Wash and dry all vegetables thoroughly.
Dice the tomatoes, cucumber, bell pepper, and red onion into bite-sized pieces.
Chop the parsley and basil.
If using fresh corn, remove the kernels from the cob.
2. Build the Salad
In a large bowl, combine the black-eyed peas, sweet corn, tomatoes, cucumber, bell pepper, red onion, parsley, and basil.
Gently toss until everything is evenly distributed.
The colors alone should make you smile.
3. Make the Dressing
In a small bowl, whisk together the olive oil, apple cider vinegar, lime juice, honey, salt, and pepper.
Taste and adjust the seasoning as needed.
A little more lime for brightness.
A little more honey if the vegetables need balance.
4. Bring Everything Together
Pour the dressing over the salad.
Toss gently until every ingredient is lightly coated.
Be careful not to overmix.
The tomatoes will appreciate your patience.
5. Rest Before Serving
Allow the salad to sit for 15 to 20 minutes before serving.
Not because it has to.
Because it benefits from the pause.
The flavors settle in and begin working together.
What to Serve With It
This salad was made for summer tables.
Serve it alongside Peach BBQ Chicken and baked macaroni and cheese for a meal that feels both celebratory and familiar.
The chicken brings sweetness and smoke.
The macaroni and cheese brings comfort.
The salad brings freshness and color.
Each dish does something different.
Together, they feel complete.
From the Kitchen
Black-eyed peas have long carried a reputation for luck and prosperity.
Whether you believe that or not, I think something is comforting about foods that carry stories.
Recipes are rarely just ingredients.
They are memories.
Traditions.
Conversations passed from one generation to another.
This salad is simple.
A handful of vegetables.
A few pantry staples.
Nothing complicated.
But sometimes the simplest dishes are the ones people return to for years.
Not because they are fancy.
Because they remind us of summer.
And summers have a way of staying with us.
Please like, comment, and share
Resources for Hard Times
If you’re looking for practical help, food support, or community resources, you can visit the Salt, Ink & Soul Resources Page.