Category: recipes

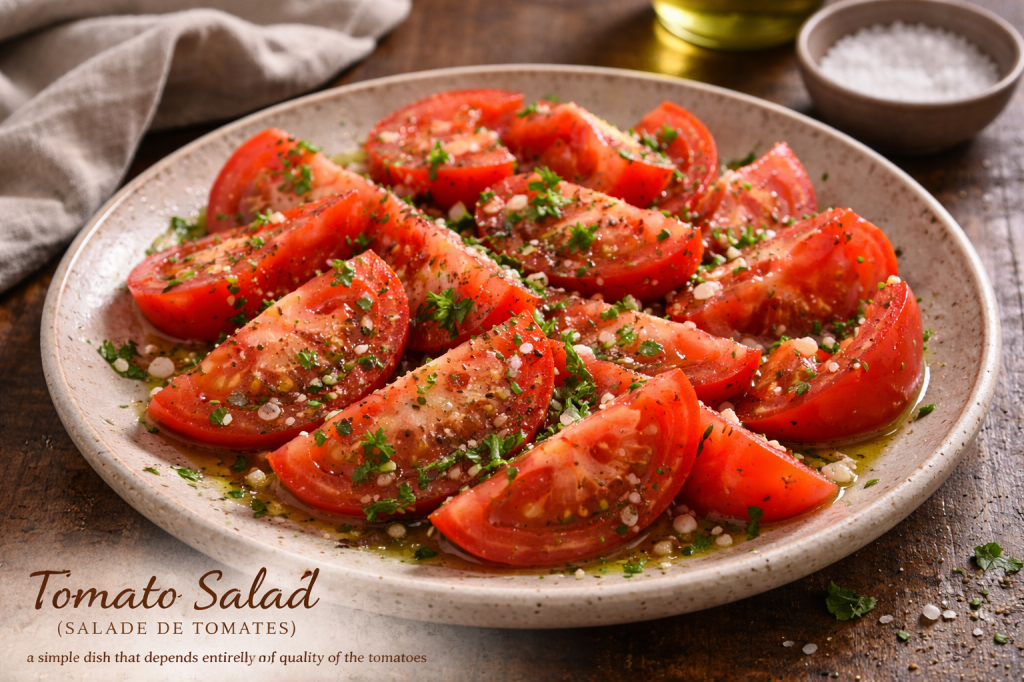
  • Tomato Salad 

    Tomato Salad 

    A bright, simple dish for warm days.

    You may ask why a salad.

    Fair question.

    Here in New Mexico, the seasons don’t really announce themselves politely. One week, the mornings still carry a little chill, the next the sun is leaning hard against the windows, and suddenly the last thing you want to do is fire up the oven and turn the house into a brick kiln. When that shift happens, a lot of us start cooking differently. We look for meals that don’t demand heat, or patience, or a sweaty kitchen. Food that’s lighter, quicker, but still delivers the flavor you’re after.

    That’s where a dish like this comes in.

    A bright tomato salad. Nothing complicated. Just good tomatoes, a little salt, olive oil, maybe a sharp whisper of shallot and vinegar. The kind of thing that reminds you that sometimes the best meals are the ones that barely require cooking at all.

    Tomorrow I’ll be posting a recipe for focaccia that goes perfectly with this — something warm to tear apart and drag through the tomato juices — and of course it pairs beautifully with the Tuscan chicken we shared earlier this week.

    Not bad for a plate of tomatoes.

    Tomato Salad 

    Serves: 4

    Ingredients

    Ripe Tomatoes — 4–6, sliced into wedges or thick slices

    This dish lives and dies by the tomatoes. Choose the ripest ones you can find.

    Shallot — 1 small, very finely minced

    A gentler cousin to the onion, adding sharpness without overpowering the tomatoes.

    Extra-Virgin Olive Oil — 2–3 tablespoons

    Good olive oil turns the tomato juices into a dressing.

    Red Wine Vinegar — 1 tablespoon

    Just enough acidity to brighten everything.

    Coarse Sea Salt — to taste

    Salt wakes the tomatoes up and draws out their natural juices.

    Freshly Ground Black Pepper

    Fresh Flat-Leaf Parsley — small handful, chopped

    Method

    1. Arrange the Tomatoes

    Lay the sliced tomatoes across a wide plate or shallow bowl.

    Give them space so their juices have somewhere to collect.

    2. Salt and Let Them Rest

    Season the tomatoes generously with sea salt.

    Let them sit for 5–10 minutes.

    During this time, the salt draws out the tomato juices, creating the beginnings of a natural dressing.

    3. Add the Shallot

    Scatter the minced shallot across the tomatoes.

    It will soften slightly as it mingles with the juices.

    4. Build the Dressing

    Add the red wine vinegar.

    Drizzle the olive oil across the salad.

    Season lightly with freshly ground black pepper.

    5. Finish

    Sprinkle the chopped parsley over the top.

    Just before serving, spoon some of the tomato juices from the bottom of the plate back over the tomatoes.

    Those juices are the best part.

    Notes From the Kitchen

    This dish rises and falls entirely on the quality of the tomatoes.

    If they are ripe, warm from the sun, and full of flavor, this salad will taste like something far greater than the sum of its parts.

    If they are not…

    No amount of olive oil will save them.

    So wait for the right tomatoes.

    They are worth it.

    Tomorrow I’ll share the rustic focaccia that belongs beside a plate of tomatoes like this — perfect for soaking up the last of that olive oil and tomato juice.

    Kyle J. Hayes

    kylehayesblog.com

    Please like, comment, and share

    Resources for Hard Times

    If you’re looking for practical help, food support, or community resources, you can visit the Salt, Ink & Soul Resources Page.
    👉 Resources for Hard Times

  • Creamy Tuscan Garlic Chicken Casserole (Keto)

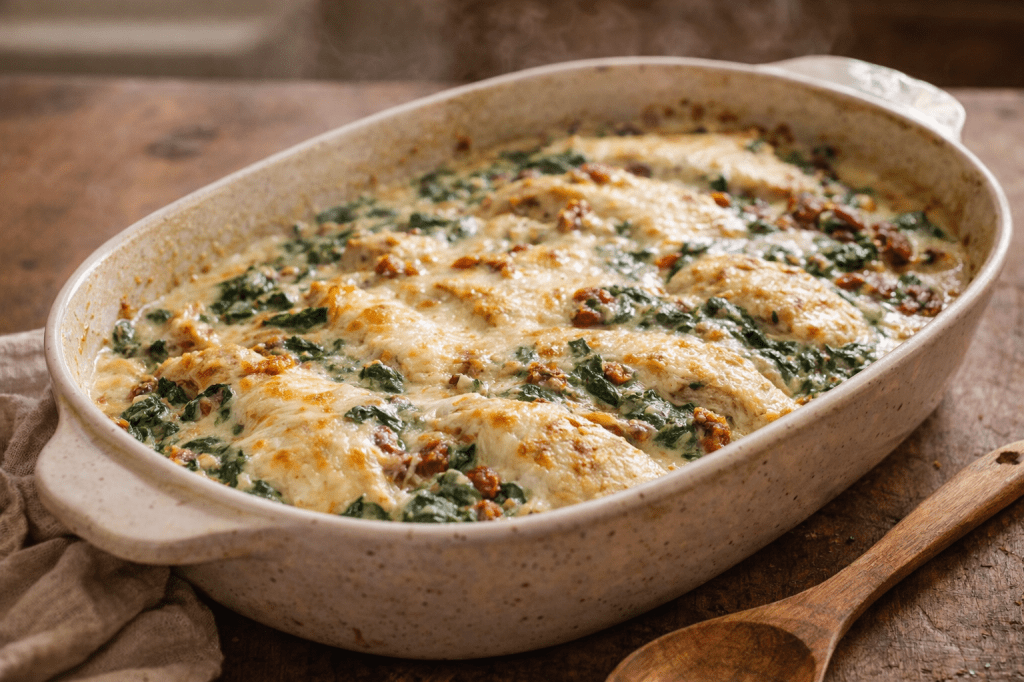
    Creamy Tuscan Garlic Chicken Casserole (Keto)

    A warm, quiet kind of comfort from the oven.

    Some meals feel like they belong to a particular moment.

    A long day.

    A tired evening.

    A kitchen that’s quieter than it was earlier.

    This is the kind of dish that fits there.

    Chicken, garlic, cream, Spinach — simple ingredients that don’t ask for much attention but still manage to come together into something deeply comforting. The garlic wakes everything up. The Parmesan deepens the flavor. The sun-dried tomatoes bring just enough brightness to cut through the richness of the Cream.

    And because the ingredients stay low in carbohydrates, the whole dish fits comfortably within a keto way of eating.

    Nothing complicated.

    Just a casserole that comes out of the oven bubbling gently around the edges while the kitchen fills with the smell of garlic and Cream.

    Sometimes that’s exactly the kind of dinner the day calls for.

    Creamy Tuscan Garlic Chicken Casserole

    Keto • Low Carb

    Servings: 4

    Ingredients

    Chicken Breasts — 4, cooked and sliced

    The heart of the dish. Leftover roasted or grilled chicken works beautifully here.

    Fresh Spinach — 2 cups

    Spinach wilts quickly, adding a soft, earthy balance to the Cream.

    Sun-Dried Tomatoes — ½ cup, chopped.

    A small burst of sweetness and acidity that keeps the sauce from feeling too heavy.

    Heavy Cream — 2 cups

    This becomes the body of the sauce — rich, smooth, and deeply comforting.

    Parmesan Cheese — 1 cup, grated

    Sharp, salty, and full of flavor. Parmesan gives the sauce its depth.

    Garlic — 4 cloves, minced

    Garlic is the quiet backbone of this dish.

    Salt and Freshly Ground Black Pepper — to taste

    Optional but recommended:

    1 cup shredded mozzarella for topping — adds a golden finish when baked.

    Instructions

    1. Preheat the oven.

    Preheat your oven to 375°F (190°C).

    Lightly grease a casserole dish and set it aside.

    2. Sauté the Garlic and Spinach

    In a skillet over medium heat, sauté the minced garlic for about 30 seconds, just until fragrant.

    Add the Spinach and cook until it wilts and softens.

    3. Build the Cream Sauce

    Pour the heavy Cream into the skillet and stir gently.

    Add the grated Parmesan and simmer the mixture slowly until the sauce begins to thicken.

    Season with salt and freshly ground black pepper.

    The sauce should feel rich but still pourable.

    4. Assemble the Casserole

    Arrange the sliced chicken evenly across the bottom of the casserole dish.

    Scatter the chopped sun-dried tomatoes over the chicken.

    Pour the warm cream sauce over everything, allowing it to settle into the spaces between the chicken pieces.

    If using mozzarella, sprinkle it across the top.

    5. Bake

    Place the casserole in the oven and bake for 25–30 minutes, until the sauce is bubbling gently around the edges and the top begins to turn lightly golden.

    Let it rest for a few minutes before serving.

    Notes From the Kitchen

    This is one of those dishes that reheats beautifully the next day.

    The sauce thickens slightly overnight, and the flavors settle into one another, making the second serving feel even better than the first.

    A few simple additions work nicely if you feel like changing it up:

    • sautéed mushrooms

    • roasted cauliflower

    • a small pinch of red pepper flakes

    But the truth is, it doesn’t really need much.

    Chicken.

    Garlic.

    Cream.

    A quiet dinner that asks very little from you and still manages to feel like comfort.

    Later this week, I’ll share the simple tomato salad and rustic focaccia that often accompany this dish on my table.

    Kyle J. Hayes

    kylehayesblog.com

    Please like, comment, and share

    Resources for Hard Times

    If you’re looking for practical help, food support, or community resources, you can visit the Salt, Ink & Soul Resources Page.
    👉 Resources for Hard Times

  • The Patient Flame

    The Patient Flame

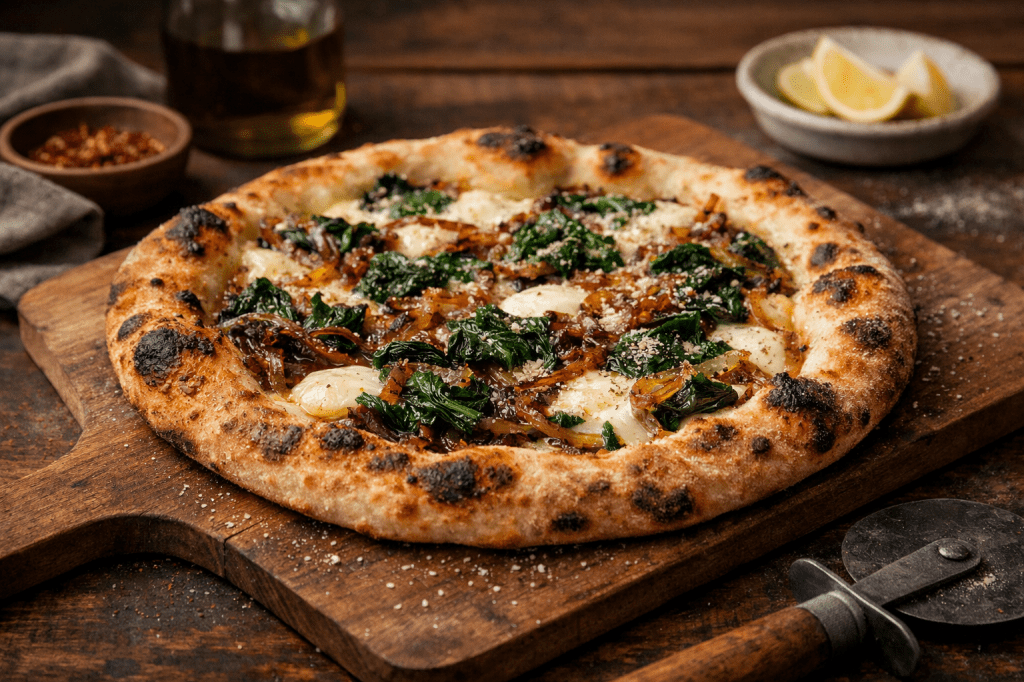
    Caramelized Onion & Spinach Neapolitan Pizza

    There’s a comfort in repeating what you already know you can do.

    A pepperoni pizza that lands “OK” is still a kind of shelter—reliable, salty, familiar. A small proof that your hands can make something people will eat without wincing.

    But after a while, OK starts to feel like a ceiling.

    Not because it’s bad.

    Because it’s finished.

    And I’m not finished.

    So I’m stepping out of the loud, easy certainty of pepperoni and into something slower. Something that asks for patience instead of bravado—onions that only turn sweet when you give them time, greens that behave only when you respect their water, dough that becomes itself overnight in the cold.

    I even gave it a name.

    The Patient Flame.

    Because that’s what this is:

    a quiet kind of heat that doesn’t rush,

    a craft that doesn’t perform,

    a meal that doesn’t need to be guilty to be good.

    It’s not a miracle.

    And it’s not a cleanse.

    It’s just me learning to widen the doorway of what I can make.

    One humble, healthier-ish slice at a time.

    Stay with me.

    I can’t promise perfection.

    But I can promise it will be tasty.

    The Patient Flame

    A Neapolitan-style pie built on restraint:

    long-fermented dough,

    sweet caramelized onions,

    and spinach treated with enough respect that it doesn’t drown the crust.

    Simple toppings.

    Honest flavor.

    Recipe Details

    Yield: 1 (14-inch) pizza

    Prep Time: 30 minutes active

    Fermentation: 18–24 hours

    Cook Time: 5–7 minutes

    Ingredients

    Dough (Make 1 day ahead)

    270 g 00 flour

    167 g warm water (95–105°F)

    1 g active dry yeast (about ¼ tsp)

    6 g fine sea salt (about 1 tsp)

    Toppings

    1 large yellow onion, thinly sliced

    1–1½ cups fresh spinach

    1 tbsp olive oil (for onions)

    ½ tsp olive oil (for spinach)

    Pinch of salt

    3–4 oz mozzarella, torn or sliced

    (low-moisture melts cleaner in a home oven, though fresh mozzarella works if patted dry)

    Optional finish:

    black pepper

    pecorino or parmesan

    red pepper flakes

    A small squeeze of lemon

    Equipment

    Electric mixer with a dough hook

    Large bowl with lid or plastic wrap

    Skillet (for onions and spinach)

    Pizza stone or steel (recommended)

    Pizza peel or upside-down baking sheet

    Instructions

    1. Bloom the Yeast

    Add 167 g of warm water to a small bowl.

    Stir in 1 g active dry yeast.

    Let it rest 5–10 minutes, until slightly foamy or creamy.

    No sugar needed.

    You’re not trying to rush anything here.

    2. Make the Dough

    Add 270 g 00 flour to the mixer bowl.

    Start the mixer on low and slowly pour in the yeast water.

    Mix 2–3 minutes until the dough becomes shaggy.

    Add 6 g salt.

    Continue mixing 6–8 minutes on low-medium until smooth and elastic.

    The dough should feel:

    soft

    smooth

    slightly tacky

    Not wet.

    3. Bulk Rest & Cold Ferment

    Shape the dough into a tight ball.

    Place in a lightly oiled bowl and cover.

    Let it rest for 1 hour at room temperature.

    Then refrigerate 18–24 hours.

    This quiet time is where the flavor deepens.

    4. Bring the Dough Back

    About 2 hours before baking, remove the dough from the refrigerator.

    Keep covered and allow it to relax at room temperature until soft and puffy.

    5. Caramelize the Onion

    Heat 1 tbsp olive oil in a skillet over medium-low heat.

    Add sliced onion and a pinch of salt.

    Cook 20–30 minutes, stirring occasionally.

    Lower the heat if needed. The goal is deep golden sweetness, not fried onions.

    Optional: add ½ tsp balsamic vinegar at the end for depth.

    Let cool before topping the pizza.

    6. Prepare the Spinach

    Heat ½ tsp olive oil in a small pan.

    Add spinach and a pinch of salt.

    Wilt for 1–2 minutes.

    Transfer to a towel and squeeze out excess moisture.

    Roughly chop.

    This step is the difference between a crisp crust and a soggy apology.

    7. Preheat the Oven

    Place pizza stone or steel in the oven.

    Preheat to 550°F for 45 minutes.

    High heat is what gives pizza life.

    8. Shape the Dough

    Lightly flour your surface with 00 flour.

    Press the dough outward from the center, leaving a 1-inch rim.

    Stretch gently to 14 inches.

    No rolling pin.

    Let gravity help.

    9. Assemble “The Patient Flame.”

    On the stretched dough:

    Add mozzarella in a light layer.

    Scatter the caramelized onions evenly.

    Add spinach in small clusters.

    Optional finish:

    pinch of pecorino or parmesan

    fresh cracked black pepper

    Neapolitan pizza rewards restraint.

    Less topping means a better bake.

    10. Bake

    Bake 5–7 minutes at 550°F.

    Rotate once if your oven has hot spots.

    You’re looking for:

    a puffy rim

    dark blistered spots

    melted cheese without puddling

    a center that’s fully cooked

    Optional Finish

    Drizzle olive oil.

    Crack fresh black pepper.

    Add a small squeeze of lemon.

    It brightens the spinach in a quiet, honest way.

    Notes From My Kitchen

    • Fresh mozzarella should be patted dry to prevent it from waterlogging the center.
    • Too many onions will steam the crust.
    • Spinach must be squeezed.
    • That part is non-negotiable.

    Kyle J. Hayes

    kylehayesblog.com

    Please like, comment, and share

    Resources for Hard Times

    If you’re looking for practical help, food support, or community resources, you can visit the Salt, Ink & Soul Resources Page.
    👉 Resources for Hard Times

    Links

  • Keto Chicken Alfredo

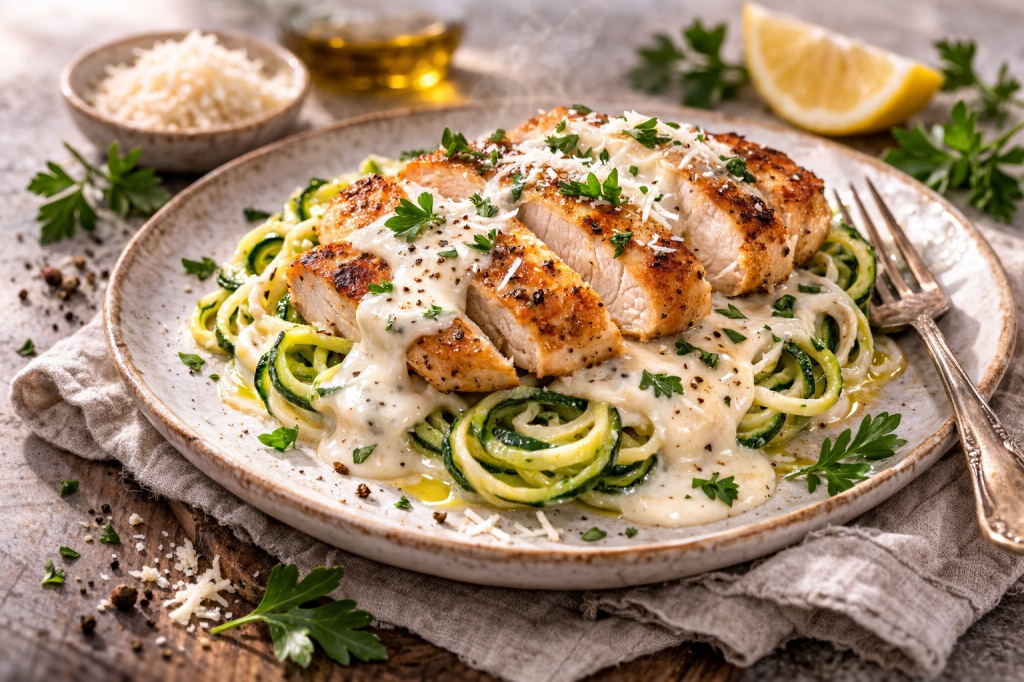
    Keto Chicken Alfredo

    Comfort without collapse

    Some people say keto is restrictive.

    I thought that too.

    When I first started, everything felt like subtraction. No pasta. No bread. No familiar weight on the plate. So I did what most of us do — I searched for substitutes. Some worked. Some didn’t. Some felt like pretending.

    But every now and then, something lands.

    This is one of those times.

    What I realized is this: Alfredo was never about the pasta. It was about the cream. The garlic. The Parmesan. The warmth. The fullness.

    Zucchini and spaghetti squash aren’t replacements.

    Their structure.

    This isn’t about restriction.

    It’s about learning what actually matters.

    Why This Version Works

    • Seasoned chicken, not plain protein
    • Real cream and real Parmesan
    • Vegetables that support instead of compete
    • Richness without excess

    Comfort stays.

    Heaviness doesn’t.

    Recipe Details

    Serves: 4

    Prep Time: 15 minutes

    Cook Time: 25 minutes

    Total Time: About 40 minutes

    Ingredients

    For the Chicken

    • 4 boneless, skinless chicken breasts
    • 1 tsp salt
    • 1 tsp black pepper
    • 2 tbsp olive oil

    For the Alfredo Sauce

    • 3 tbsp unsalted butter
    • 2 cloves garlic, minced
    • 1 cup heavy cream
    • 1 cup freshly grated Parmesan cheese
    • Salt and black pepper, to taste

    For the Base

    • 2 medium zucchinis, spiralized
    • or
    • 1 medium spaghetti squash

    Garnish

    • Chopped parsley
    • Additional grated Parmesan

    Instructions

    1. Cook the chicken

    Pat the chicken dry and season evenly with salt and pepper.

    Heat olive oil in a skillet over medium heat.

    Cook 5–7 minutes per side, depending on thickness, until golden and cooked through (internal temperature of 165°F).

    Do not overcook.

    Moisture is part of the experience.

    Remove and let rest before slicing.

    2. Build the sauce

    In a saucepan, melt butter over medium heat.

    Add garlic and cook just until fragrant — about 1 minute.

    Pour in the heavy cream and bring to a gentle simmer.

    Cook 4–5 minutes, until slightly thickened.

    Lower the heat and stir in Parmesan until smooth.

    Season to taste.

    The sauce should coat the back of a spoon.

    Don’t drown it.

    3. Prepare the base

    For zucchini:

    Sauté lightly in olive oil for 2–3 minutes until just tender. Do not overcook.

    For spaghetti squash:

    Roast at 400°F for 35–40 minutes. Scrape into strands.

    Both should hold their shape.

    4. Bring it together

    Slice the rested chicken.

    Plate the zucchini or squash.

    Lay the chicken over the top.

    Spoon the Alfredo sauce with intention.

    Finish with parsley and Parmesan.

    To Serve

    Serve hot.

    Serve simply.

    No need to explain that it’s keto.

    Let the plate speak.

    This is not food that apologizes.

    It’s food that adapts.

    And sometimes, that’s enough.

    Kyle J. Hayes

    kylehayesblog.com

    Please like, comment, and share

    Resources for Hard Times

    If you’re looking for practical help, food support, or community resources, you can visit the Salt, Ink & Soul Resources Page.
    👉 Resources for Hard Times

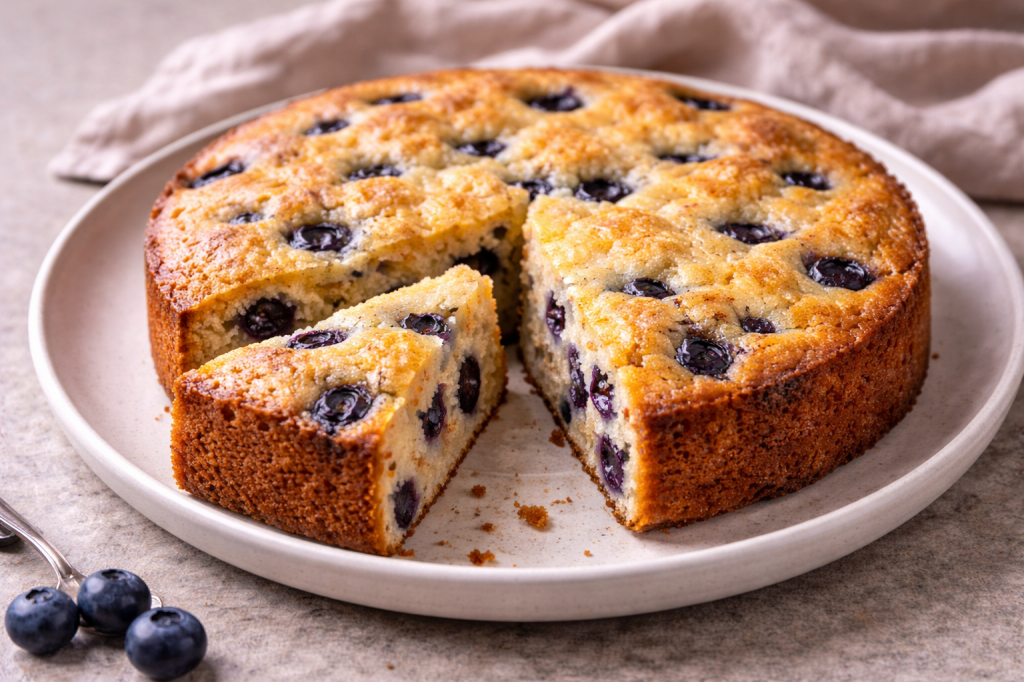
  • Blueberry Tea Cake (Keto)

    Blueberry Tea Cake (Keto)

    A quiet answer to a loud craving

    I love sweets.

    They are my weakness.

    If I don’t have something close by to answer that craving, I will go to the store and buy far more than I need. Not because I’m hungry — because I’m reaching. Reaching for comfort. For reward. For something easy.

    So I’ve learned to keep something like this around.

    A cake that satisfies without unraveling discipline. Something measured. Something made with intention. Something that understands restraint.

    Tea cake has always lived in the in-between — not quite dessert, not quite breakfast. Something you slice in the afternoon when the house is quiet. Something that doesn’t need frosting to feel complete.

    This version keeps that spirit. It trades flour for almond flour. Sugar for monkfruit. It leans into blueberries and a touch of lemon for brightness. It isn’t trying to be indulgent. It’s trying to be enough.

    Sweet. Light. Steady.

    Why This Version Works

    • Low carb without tasting compromised
    • Almond flour keeps it tender
    • Blueberries bring natural sweetness and contrast
    • Lemon zest lifts everything quietly

    This is not a cake that shouts.

    It waits.

    Recipe Details

    Serves: 8

    Prep Time: 10 minutes

    Bake Time: 25–30 minutes

    Total Time: About 40 minutes

    Ingredients

    • 2 cups almond flour
    • ¾ cup monkfruit sweetener
    • 1 tsp baking powder
    • Pinch of salt
    • ½ cup unsalted butter, melted
    • 3 large eggs
    • 1 tsp vanilla extract
    • ½ cup unsweetened almond milk
    • 1 cup blueberries (fresh or frozen)
    • 1 tbsp lemon zest (optional, but recommended)

    Instructions

    1. Prepare the oven

    Preheat oven to 350°F (175°C).

    Grease or line an 8-inch cake pan.

    2. Combine the dry ingredients

    In a bowl, whisk together:

    • almond flour
    • monkfruit sweetener
    • baking powder
    • salt

    Set aside.

    3. Mix the wet ingredients

    In a separate bowl, whisk:

    • melted butter
    • eggs
    • vanilla
    • almond milk

    The mixture should look smooth and cohesive.

    4. Bring it together

    Add the wet ingredients to the dry.

    Stir gently until just combined.

    Do not overmix.

    Tenderness lives in restraint.

    5. Fold in the blueberries

    Gently fold in the blueberries and lemon zest.

    Move slowly. Keep the batter light.

    6. Bake

    Pour the batter into the prepared pan and smooth the top.

    Bake for 25–30 minutes, or until the top is lightly golden and a toothpick inserted in the center comes out clean.

    7. Rest

    Let the cake cool in the pan for 10 minutes before transferring to a wire rack.

    Cooling allows the structure to settle.

    To Serve

    Slice simply.

    Serve plain, or with a spoonful of lightly sweetened whipped cream.

    Keep it modest.

    This isn’t cake for spectacle.

    It’s cake for steadiness.

    Notes

    • Frozen blueberries work well — do not thaw first
    • If the top browns too quickly, tent loosely with foil
    • Stores covered at room temperature for 2 days or refrigerated up to 5 days

    Kyle J. Hayes

    kylehayesblog.com

    Please like, comment, and share

    Resources for Hard Times

    If you’re looking for practical help, food support, or community resources, you can visit the Salt, Ink & Soul Resources Page.
    👉 Resources for Hard Times

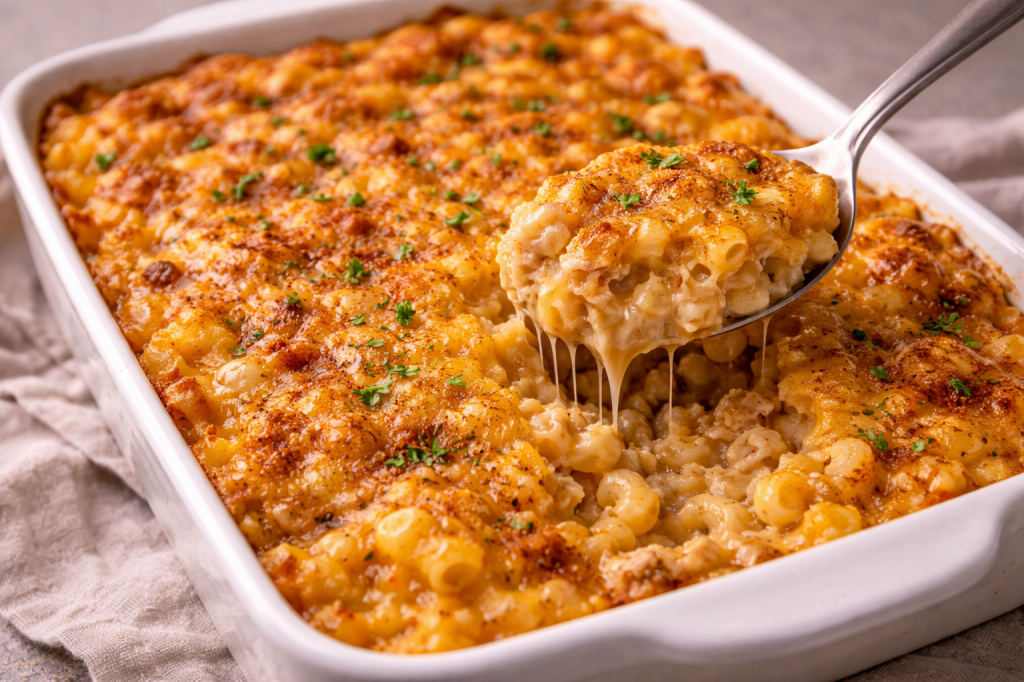
  • Chicken Mac and Cheese Casserole

    Chicken Mac and Cheese Casserole

    A dish that understands gathering

    Some meals feel like Sunday even when it isn’t.

    Chicken and macaroni baked together is one of them.

    It sits somewhere between stretch and celebration — practical enough for a weeknight, rich enough for company. This isn’t the neon orange shortcut version. This is layered. Seasoned. Baked until the edges tell the truth.

    It’s the kind of dish that doesn’t ask who’s coming.

    It just makes room.

    Why This Version Works

    • Seasoned chicken — not plain filler
    • Real cheese, layered
    • Baked, not just stirred
    • Creamy but structured

    This is casserole as care.

    Recipe Details

    Serves: 6–8

    Prep Time: 20 minutes

    Cook Time: 35–40 minutes

    Total Time: About 1 hour

    Ingredients

    For the Chicken

    • 2 cups cooked chicken, shredded or diced
    • (Rotisserie works, but season it again)
    • ½ tsp garlic powder
    • ½ tsp onion powder
    • ½ tsp smoked paprika
    • ¼ tsp black pepper
    • Pinch cayenne (optional)

    For the Mac Base

    • 12 oz elbow macaroni
    • 3 tbsp butter
    • 3 tbsp flour
    • 2 cups whole milk
    • ½ cup heavy cream
    • 1 tsp Dijon mustard (optional but right)
    • ½ tsp salt
    • ½ tsp black pepper
    • ½ tsp smoked paprika

    The Cheese

    • 2 cups sharp cheddar, shredded
    • 1 cup Monterey Jack or Colby, shredded
    • ½ cup mozzarella (for stretch)

    Topping (Optional but Encouraged)

    • ½ cup shredded cheddar
    • ¼ cup crushed butter crackers or seasoned breadcrumbs
    • 1 tbsp melted butter

    Instructions

    1. Boil the pasta

    Cook macaroni in salted water until just shy of al dente.

    Drain. Set aside.

    2. Season the chicken

    Toss cooked chicken with garlic powder, onion powder, smoked paprika, pepper, and cayenne.

    It shouldn’t taste like an afterthought.

    3. Build the sauce

    In a large saucepan:

    Melt butter over medium heat.

    Whisk in the flour and cook for 1–2 minutes, until lightly golden.

    Slowly whisk in milk and cream.

    Cook until thickened — about 4–5 minutes.

    Stir in:

    • salt
    • pepper
    • smoked paprika
    • Dijon

    Lower heat. Add cheddar and Monterey Jack.

    Stir until smooth and fully melted.

    4. Bring it together

    Fold pasta and seasoned chicken into the cheese sauce.

    Taste. Adjust salt if needed.

    It should taste complete before it hits the oven.

    5. Assemble

    Preheat oven to 375°F.

    Lightly grease a 9×13 baking dish.

    Pour the mixture into the dish.

    Top with mozzarella and extra cheddar.

    If using topping:

    Mix crushed crackers with melted butter and sprinkle lightly.

    6. Bake

    Bake uncovered for 30–40 minutes, until bubbly and golden at the edges.

    Let rest 10 minutes before serving.

    Resting matters. It settles everything.

    To Serve

    Serve with:

    • Collard greens
    • Green beans
    • Or just a quiet kitchen and people who came hungry

    Notes

    • Add sautéed onions or bell peppers for depth
    • For extra richness, add 4 oz cream cheese to the sauce
    • This reheats beautifully

    This is not fast food.

    It’s food that remembers why we gather.

    Kyle J. Hayes

    kylehayesblog.com

    Please like, comment, and share

    Resources for Hard Times

    If you’re looking for practical help, food support, or community resources, you can visit the Salt, Ink & Soul Resources Page.
    👉 Resources for Hard Times

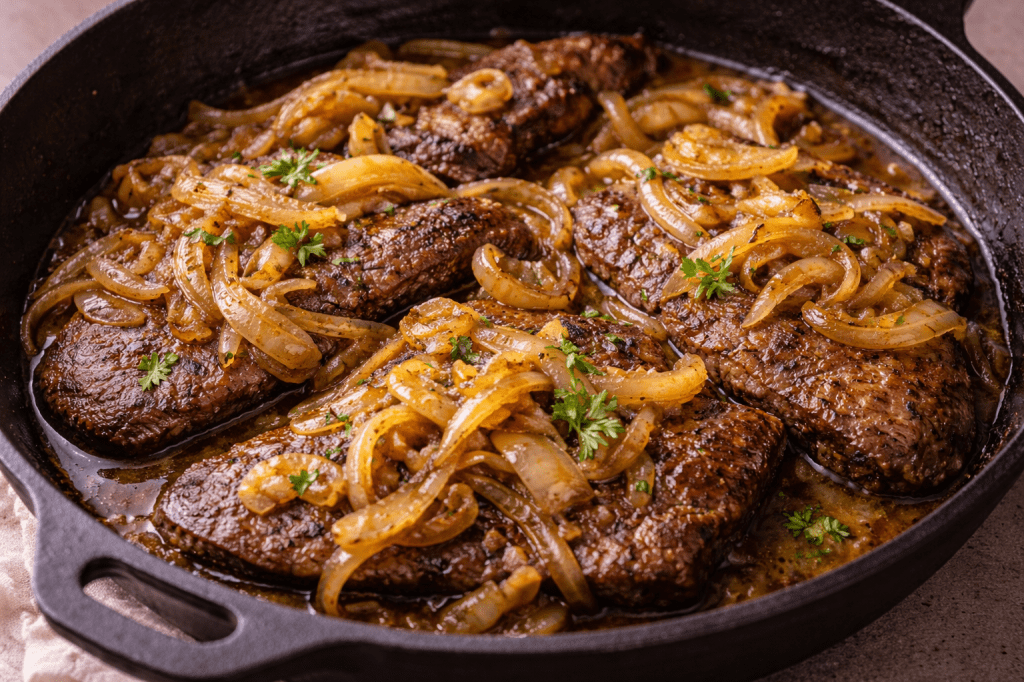
  • Liver and Onions 

    Liver and Onions 

    Like most children, I hated liver.

    Everything about it — the look, the smell, the taste. You were always told it was good for you, the way adults say things when they know you won’t enjoy them. My mother made liver and onions every now and then, and like most people we knew, she cooked it well done, like every other meat. By the time it hit the plate, it resembled shoe leather. You ate it fast so you wouldn’t taste it, swallowing memory along with obligation.

    That stayed with me.

    So when people later talked about how good liver could be, I assumed they were either lying or nostalgic. Then someone whose opinion I respected told me something simple: your taste buds change. So I tried it again. I don’t know if it was age or skill, but what I tasted wasn’t what I remembered. This recipe is for anyone still traumatized by that first version. Try it. You might like it.

    Why This Version Works for me 

    • Liver cooked tender, not punished
    • Onions are slow and sweet, not rushed
    • Respect for the ingredient — and the eater

    Recipe Details

    Serves: 2–3

    Prep Time: 15 minutes

    Cook Time: 20 minutes

    Total Time: About 35 minutes

    Ingredients

    Liver

    • 1 lb beef liver, sliced
    • 1 cup milk (for soaking)
    • Salt and black pepper, to taste
    • ½ tsp garlic powder
    • ½ tsp onion powder
    • ½ tsp smoked paprika
    • ¼ tsp cayenne pepper (optional)
    • ½ cup all-purpose flour (for dredging)

    Onions

    • 2 large yellow onions, thinly sliced
    • 2 tbsp butter
    • 1 tbsp oil
    • Pinch of salt

    For Cooking

    • 2 tbsp oil
    • 1 tbsp butter

    Instructions

    1. Soak the liver

    Place liver slices in a bowl and cover with milk.

    Soak for 20–30 minutes, then drain and pat dry.

    This softens the flavor and changes everything.

    2. Season and dredge

    Season the liver lightly with:

    • salt
    • black pepper
    • garlic powder
    • onion powder
    • smoked paprika
    • cayenne (if using)

    Dredge lightly in flour. Shake off excess.

    3. Cook the onions

    Heat butter and oil in a skillet over medium heat.

    Add onions with a pinch of salt.

    Cook slowly, stirring occasionally, until soft, golden, and lightly sweet — about 10–12 minutes.

    Remove and set aside.

    4. Cook the liver

    In the same skillet, add oil and butter if needed.

    Cook liver slices over medium-high heat, about 2–3 minutes per side.

    You want a good sear and a tender center — not overcooked.

    5. Bring it together

    Return onions to the skillet.

    Gently toss with the liver and let everything warm together for 1–2 minutes.

    Taste and adjust seasoning.

    Serve

    Serve hot with:

    • mashed potatoes
    • rice
    • or a piece of cornbread to catch what’s left in the pan. (see recipe)

    This is food that asks you to slow down — just a little.

    Notes

    • Overcooking is what ruins liver. Stop before you think you should.
    • Milk soak matters. Don’t skip it.
    • This dish is about restraint, not force.

    Kyle J. Hayes

    kylehayesblog.com

    Please like, comment, and share

    Resources for Hard Times

    If you’re looking for practical help, food support, or community resources, you can visit the Salt, Ink & Soul Resources Page.
    👉 Resources for Hard Times

  • The First Time

    The First Time

    The first time I had bread pudding, my mother made it.

    I don’t remember the occasion. I don’t remember the day. I only remember the way it landed—soft, warm, familiar in a way that felt older than me. Like something meant to comfort without asking questions.

    I don’t remember her making it again.

    But that first bite stayed. Long enough that, years later, I found myself trying to chase it. First, with store-bought sliced bread. Then with better bread. Then, eventually, with bread I made myself—flour, water, yeast, salt. Learning how texture changes. How time matters. How restraint matters.

    The sauces came next. Heavy ones. Sweet ones. The kind that covers mistakes. Then the lighter ones. Sharper ones. Sauces that don’t hide the pudding, just walk beside it.

    I’m still working on it. On all of it.

    But for now, this is the version I make.

    The one that feels closest to memory without trying to recreate it.

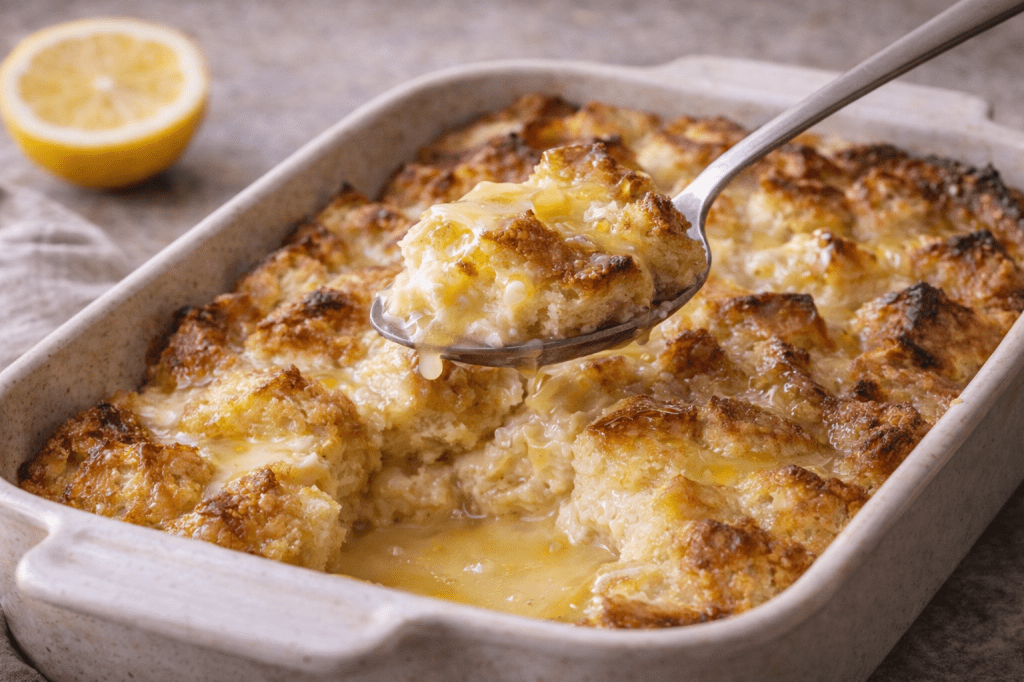
    Bread Pudding with Lemon Sauce

    Warm, custardy, and gently sweet, this bread pudding leans into comfort while the lemon sauce keeps it awake. It’s not loud. It doesn’t perform. It just sits there, waiting for you to notice.

    Recipe Details

    Serves: 6–8

    Prep Time: 20 minutes

    Bake Time: 45–50 minutes

    Total Time: About 1 hour 15 minutes

    Ingredients

    Bread Pudding

    • 4 cups cubed stale bread
    • (My personal bread recipe works well)
    • 2 cups whole milk
    • 1 cup heavy cream
    • 4 large eggs
    • 1 cup granulated sugar
    • 1 tsp vanilla extract
    • ½ tsp ground cinnamon
    • ¼ tsp ground nutmeg
    • ½ cup raisins or chopped pecans (optional)
    • Butter, for greasing the baking dish

    Lemon Sauce

    • ½ cup unsalted butter
    • ¾ cup granulated sugar
    • ½ cup heavy cream
    • Zest of 1 lemon
    • 2–3 tbsp fresh lemon juice (to taste)
    • Pinch of salt

    Instructions

    1. Prepare the pudding

    Preheat oven to 350°F (175°C).

    Butter a 9×13-inch baking dish.

    Place the cubed bread evenly in the dish. Sprinkle with raisins or pecans if using.

    2. Make the custard

    In a large bowl, whisk together:

    • milk
    • heavy cream
    • eggs
    • sugar
    • vanilla
    • cinnamon
    • nutmeg

    Pour the custard over the bread, pressing gently so everything gets soaked.

    Let sit for 20–30 minutes. This matters.

    3. Bake

    Bake uncovered for 45–50 minutes, until the center is set and the top is golden.

    Remove from the oven and let rest for a few minutes before serving.

    4. Make the lemon sauce

    While the pudding bakes, melt butter in a saucepan over medium heat.

    Add sugar and cream, stirring until the sugar dissolves.

    Bring to a gentle simmer and cook 4–5 minutes, stirring occasionally.

    Remove from heat. Stir in:

    • lemon zest
    • lemon juice
    • pinch of salt

    Taste and adjust—this sauce should be bright, not sharp.

    To Serve

    Serve the bread pudding warm.

    Spoon the lemon sauce slowly over the top.

    This isn’t a dessert that rushes you.

    It asks you to sit.

    Kyle J. Hayes

    kylehayesblog.com

    Please like, comment, and share

    Resources for Hard Times

    If you’re looking for practical help, food support, or community resources, you can visit the Salt, Ink & Soul Resources Page.
    👉 Resources for Hard Times

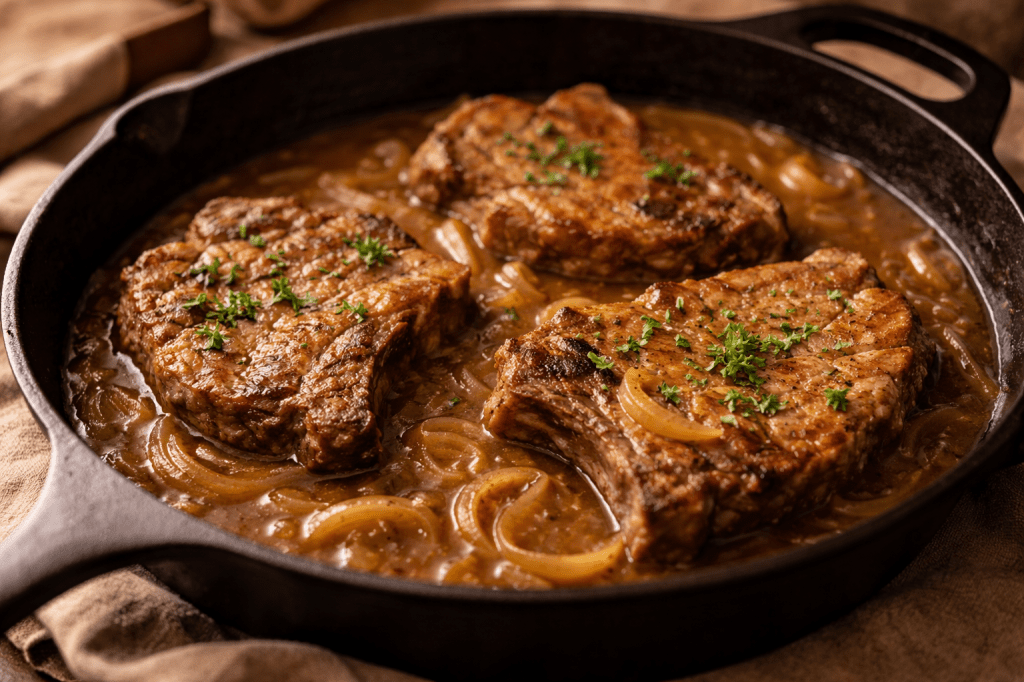
  • Smothered Pork Chops

    Smothered Pork Chops

    Some meals announce themselves.

    And some meals wait.

    Smothered pork chops belong to the second kind. They don’t arrive crispy or loud. They don’t crackle for attention. They lower the heat and take their time. They understand that tenderness isn’t something you rush—it’s something you protect.

    This is the kind of food you make when you’re tired but still want to eat well. When the day took more than it gave back. When you need something steady. Something that doesn’t argue with you.

    Smothering is an act of care.

    You cover the meat to keep it from drying out. You keep it close to the gravy so it can soften without falling apart. You let it go slow enough to become what it’s supposed to be.

    That’s the point.

    This isn’t restaurant food. It isn’t meant to impress. It doesn’t photograph clean. It shows up in a pan and asks you to sit down.

    Smothered Pork Chops

    Serves 2–3. Scales easily.

    Ingredients

    • 4 pork chops
    • (bone-in if you can—flavor and patience live there)
    • Salt and black pepper
    • Garlic powder (optional, but familiar)
    • Onion powder (same)
    • ½ cup all-purpose flour
    • 2–3 tbsp neutral oil or bacon fat
    • 1 large onion, sliced
    • 2 cups chicken broth (or water, if that’s what you have)
    • Optional additions:
      • a splash of milk or cream
      • a pinch of cayenne
      • a little butter at the end

    How to Make Them

    Pat the pork chops dry. Season both sides generously with salt, pepper, and whatever else you think is right. Not measured. Just enough that you’d miss it if it wasn’t there.

    Dredge lightly in flour. Shake off the excess. You’re not breading. You’re giving the gravy something to hold onto later.

    Heat the oil in a wide skillet over medium heat. Brown the chops on both sides until they pick up color. Not cooked through. Just enough to look like they’ve lived a little.

    Remove the chops and set them aside.

    Lower the heat. Add the onions to the same pan. Stir them through the leftover flour and oil. Let them soften. Let them take their time. Scrape up the brown bits. Those matters.

    Slowly pour in the broth, stirring as you go. The gravy will thicken on its own if you let it. If it gets too thick, add a little more liquid. If it’s thin, give it time. Gravy knows what it’s doing.

    Taste. Adjust. This is where you decide what kind of night it’s been.

    Nestle the pork chops back into the gravy. Spoon some over the top. Cover the pan. Lower the heat.

    Let them simmer gently for 30–45 minutes, until tender. Not falling apart. Just easy.

    Finish with a little butter or milk for softness. Or don’t.

    How to Eat Them

    With rice.

    With mashed potatoes.

    With whatever helps you get the gravy where it needs to go.

    Eat them while they’re hot. Save what’s left.

    They’ll be better tomorrow.

    Some meals don’t need applause.

    They just need a fork, a chair, and a little quiet.

    Kyle J. Hayes

    kylehayesblog.com

    Please like, comment, and share

    Resources for Hard Times

    If you’re looking for practical help, food support, or community resources, you can visit the Salt, Ink & Soul Resources Page.

    👉 Resources for Hard Times

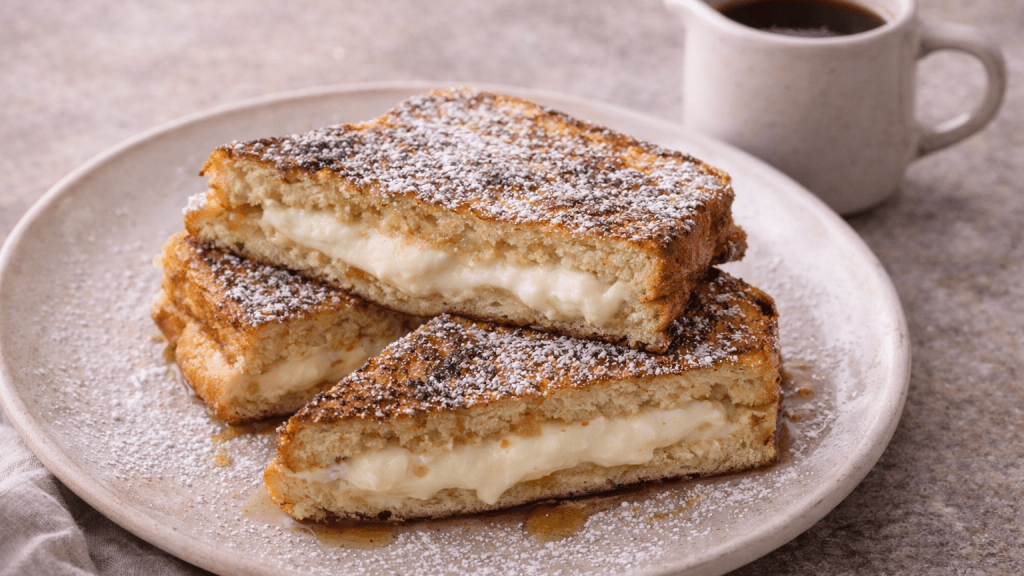
  • Soul-Food Cream Cheese–Stuffed French Toast

    Soul-Food Cream Cheese–Stuffed French Toast

    A Salt, Ink & Soul Sunday Brunch

    Some dishes live between hunger and remembrance.

    Not flashy. Not rushed.

    Just warm enough to ask you to sit down.

    This French toast belongs to Sunday mornings that don’t demand productivity. The kind that carries quiet, coffee steam, and the understanding that sweetness doesn’t need to shout to be felt.

    Recipe Details

    Serves: 2–3

    Prep Time: 15 minutes

    Cook Time: 15 minutes

    Total Time: About 30 minutes

    Ingredients

    Cream Cheese Filling

    • 4 oz cream cheese, softened
    • 1½ tbsp brown sugar
    • (white works, but brown hums deeper)
    • ½ tsp vanilla extract
    • Pinch cinnamon

    Optional, but right:

    • 1 tsp sweet potato purée or
    • 1 tbsp mashed ripe banana

    French Toast Base

    • 6 thick slices of bread
    • Sandwich Bread or Use the recipe for “The Most Basic Bread.”
    • 2 large eggs
    • ½ cup milk or evaporated milk
    • ½ tsp cinnamon
    • ¼ tsp nutmeg
    • Pinch salt

    For Cooking

    • Butter
    • Neutral oil (canola or vegetable)

    To Finish (Choose What Fits the Morning)

    • Warm cane syrup or maple syrup
    • Powdered sugar
    • Butter-pecan drizzle (optional, but devastating)
    • Fried apples or peaches
    • Crispy bacon or sausage on the side

    Instructions

    1. Make the filling

    In a small bowl, mix together:

    • cream cheese
    • brown sugar
    • vanilla
    • cinnamon
    • sweet potato or banana (if using)

    The texture should feel spreadable and slow — something meant to be handled gently.

    2. Assemble the sandwiches

    Spread the filling evenly over 3 slices of bread.

    Top with the remaining slices.

    Press gently.

    This is care, not force.

    3. Make the custard

    In a shallow bowl, whisk together:

    • eggs
    • milk
    • cinnamon
    • nutmeg
    • salt

    Dip each sandwich briefly, turning once.

    No drowning. Just enough.

    4. Cook slowly

    Heat a skillet over medium-low heat.

    Add butter with a small splash of oil.

    Cook the sandwiches 3–4 minutes per side, slow and steady, until deeply golden and warmed through.

    If the outside speaks before the inside is ready, lower the heat.

    Always.

    Optional: Skillet Fruit

    In a small pan, add:

    • 1 apple or peach, sliced
    • 1 tbsp butter
    • 1 tsp brown sugar
    • Pinch cinnamon

    Cook until soft and glossy.

    Not jam.

    Just a memory waking up.

    To Serve

    Slice diagonally.

    Dust lightly with powdered sugar.

    Drizzle syrup after plating.

    Serve breakfast meat on the side — not on top.

    Coffee poured slowly.

    This isn’t a brunch that performs.

    It sits with you.

    A Quiet Note

    This French toast isn’t about indulgence.

    It’s about enough.

    Enough sweetness to feel cared for.

    Enough restraint to leave room for thought.

    Enough history in the spices to remind you where you’ve been.

    It’s the kind of dish that understands silence at the table.

    The kind that doesn’t need praise.

    Just presence.

    Other Recommendations: