Dessert does not always need flour.
It does not always need a crust, a cake pan, or the kind of sweetness that leaves the body tired afterward.
Sometimes dessert can be small.
Cold.
Dark.
Quiet.
A spoon moving through chocolate thickened by cream and patience.
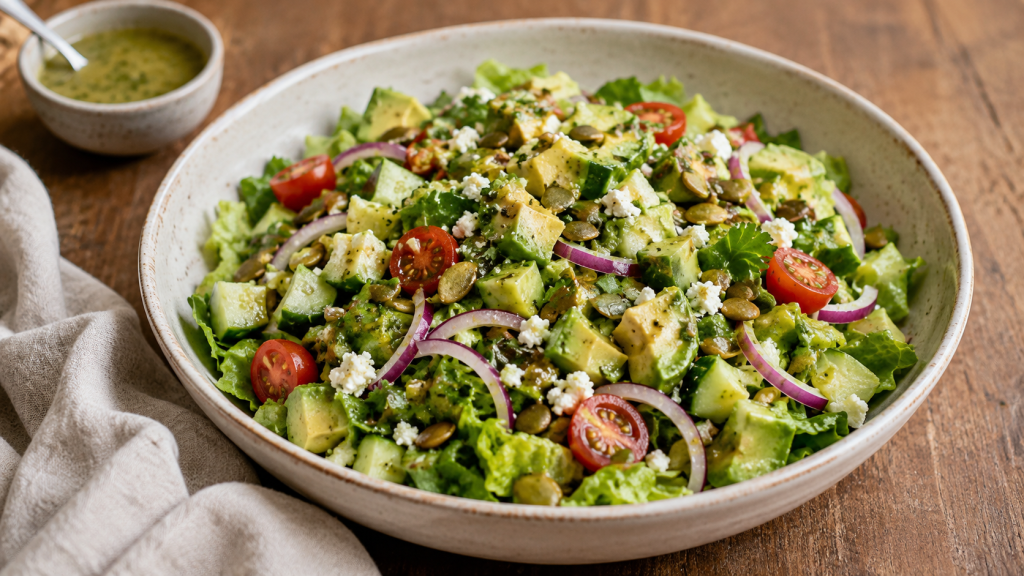
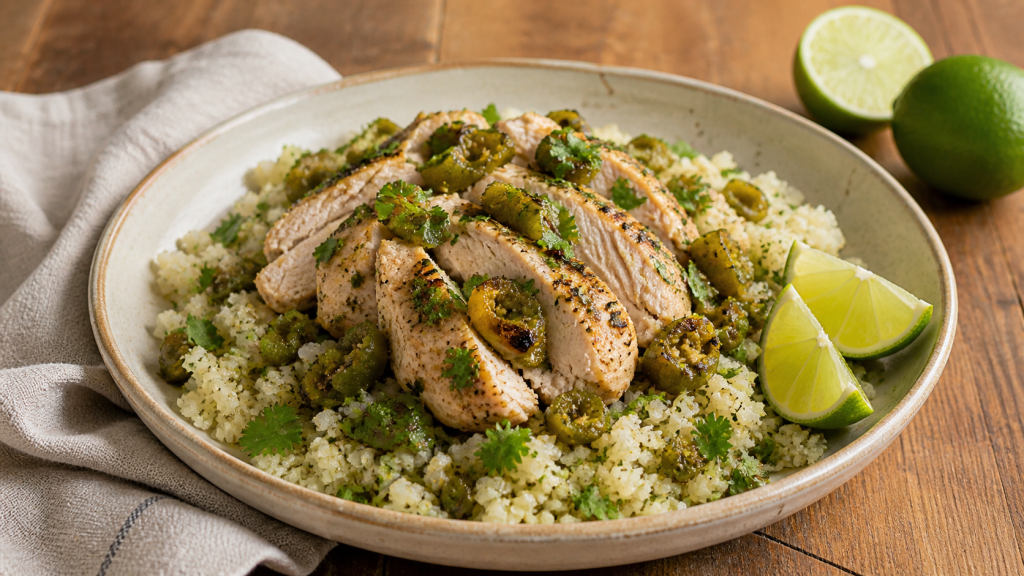
This week began with green chile lime chicken and cauliflower rice. Then came the green chile avocado salad, cool and sharp and full of New Mexico brightness. So, for dessert, I wanted something that didn’t break the rhythm. Something chilled. Something keto-friendly. Something with depth instead of heaviness.
That brought me to Mexican-style chocolate.
I want to be clear about that.
I am not Latino, and this is not me claiming a tradition that is not mine. This pudding is inspired by the flavors often associated with Mexican chocolate—cocoa, cinnamon, vanilla, and a small whisper of chile. I use those flavors with respect and gratitude, because good food deserves credit. Flavor has a lineage. Ingredients have memory. And when we borrow from a tradition, the least we can do is credit the source.
This is not a traditional Mexican dessert.
It is a keto chocolate pudding cup shaped like that.
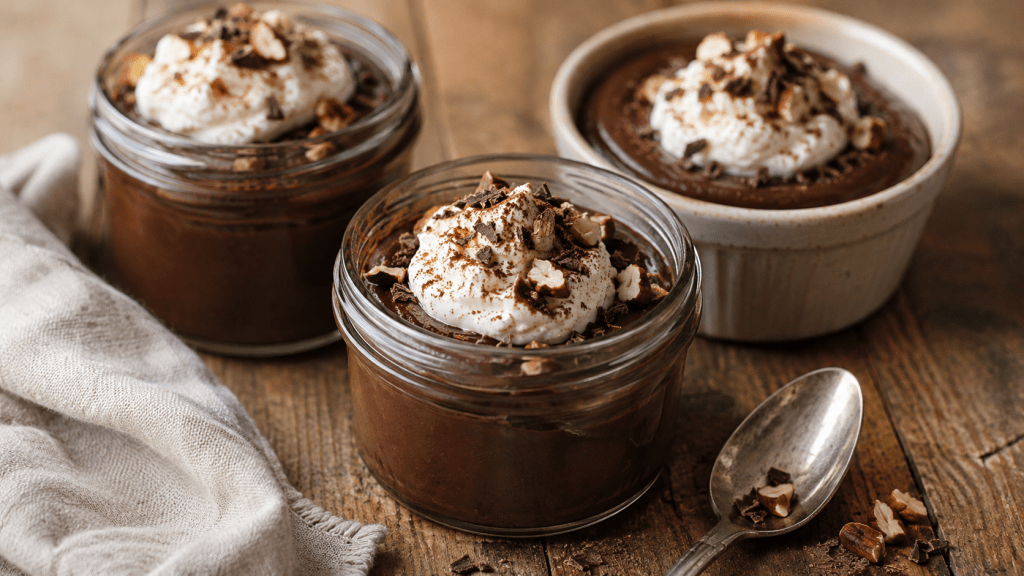
Rich cream. Unsweetened cocoa. Cinnamon. Vanilla. A pinch of salt. A little chile powder or cayenne if you want the heat to arrive at the end, quietly, like a door opening in another room.
The sweetness is controlled.
The texture is soft.
The portion is small enough to feel reasonable and rich enough to feel like a dessert.
Because even when you are trying to eat lighter, even when you are watching carbs, even when you tell yourself you do not need anything after dinner, there is still room for a little something sweet.
Especially if it knows how to leave gently.
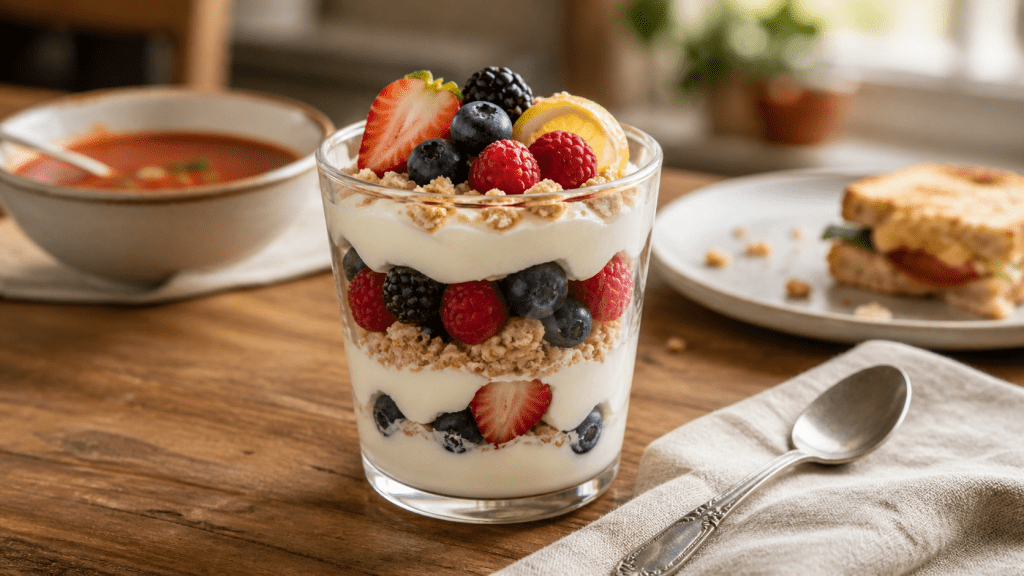
Keto Mexican Chocolate Pudding Cups
Serves
4 small pudding cups
Ingredients
- 480 ml heavy cream
- 25 g unsweetened cocoa powder
- 40 g powdered monk fruit sweetener or powdered allulose
- 1 teaspoon vanilla extract
- 1 teaspoon ground cinnamon
- ⅛ teaspoon cayenne pepper or ancho chile powder, optional
- ¼ teaspoon salt
- 2 large egg yolks
- 15 g unsalted butter
Optional Toppings
- 120 ml heavy cream, whipped
- 1 teaspoon powdered monk fruit or allulose, for whipped cream
- A light dusting of cinnamon
- Sugar-free dark chocolate shavings
- 15 g chopped pecans or almonds
Method
1. Warm the Cream
In a medium saucepan, add the heavy cream, cocoa powder, powdered sweetener, cinnamon, chile powder if using, and salt.
Set the pan over medium-low heat.
Whisk slowly until the cocoa dissolves and the cream begins to steam.
Do not boil it.
Chocolate does not need violence to become itself.
2. Temper the Egg Yolks
In a small bowl, whisk the egg yolks.
Slowly pour a small amount of the warm chocolate cream into the egg yolks while whisking constantly.
This warms the yolks gently so they do not scramble.
Add the yolk mixture back into the saucepan.
3. Thicken the Pudding
Keep the heat on low.
Whisk constantly for about 5 to 8 minutes, until the pudding thickens enough to coat the back of a spoon.
Do not rush this part.
Low heat gives you silk.
High heat gives you regret.
4. Finish
Remove the pan from the heat.
Stir in the vanilla extract and butter until smooth.
Taste carefully.
If you want more warmth, add a pinch more cinnamon or chile.
If you want more sweetness, add a little more powdered sweetener.
Let the pudding tell you what it needs.
5. Chill
Divide the pudding into 4 small cups or jars.
Cover and refrigerate for at least 2 hours, or until fully chilled and set.
6. Serve
Top with lightly sweetened whipped cream, a dusting of cinnamon, sugar-free dark chocolate shavings, or chopped nuts.
Serve cold.
Small spoon recommended.
Not because you have to be delicate.
Because this is the kind of dessert that deserves to last a little longer.
Notes From My Kitchen
For the smoothest pudding, use powdered sweetener instead of granulated. Granulated sweeteners can leave a gritty texture.
Allulose usually gives a softer, more sugar-like finish. Monk fruit works well too, especially if powdered.
Chile is optional. Use just enough to warm the chocolate, not enough to dominate it.
Ancho chile powder gives a deeper, earthier flavor. Cayenne gives sharper heat.
For a dairy-free version, use full-fat coconut milk instead of heavy cream and coconut oil instead of butter, though the flavor will change.
If you want a thicker pudding, chill it longer.
Why This Dessert Works
The chocolate brings depth.
The cinnamon brings warmth.
The Chile brings a small spark.
The cream brings softness.
And the keto structure keeps it from becoming heavier than the meal needs.
It is a dessert without collapse.
Sweetness without surrender.
A small ending after a warm week of green chile, lime, avocado, and sun.
And while it is only inspired by Mexican-style chocolate, that inspiration matters.
Because food should not erase where its beauty comes from.
It should be remembered.
It should give thanks.
Then it should be served cold, in a small cup, with a spoon.
Kyle J. Hayes
Please like, comment, and share
Resources for Hard Times
If you’re looking for practical help, food support, or community resources, you can visit the Salt, Ink & Soul Resources Page.